
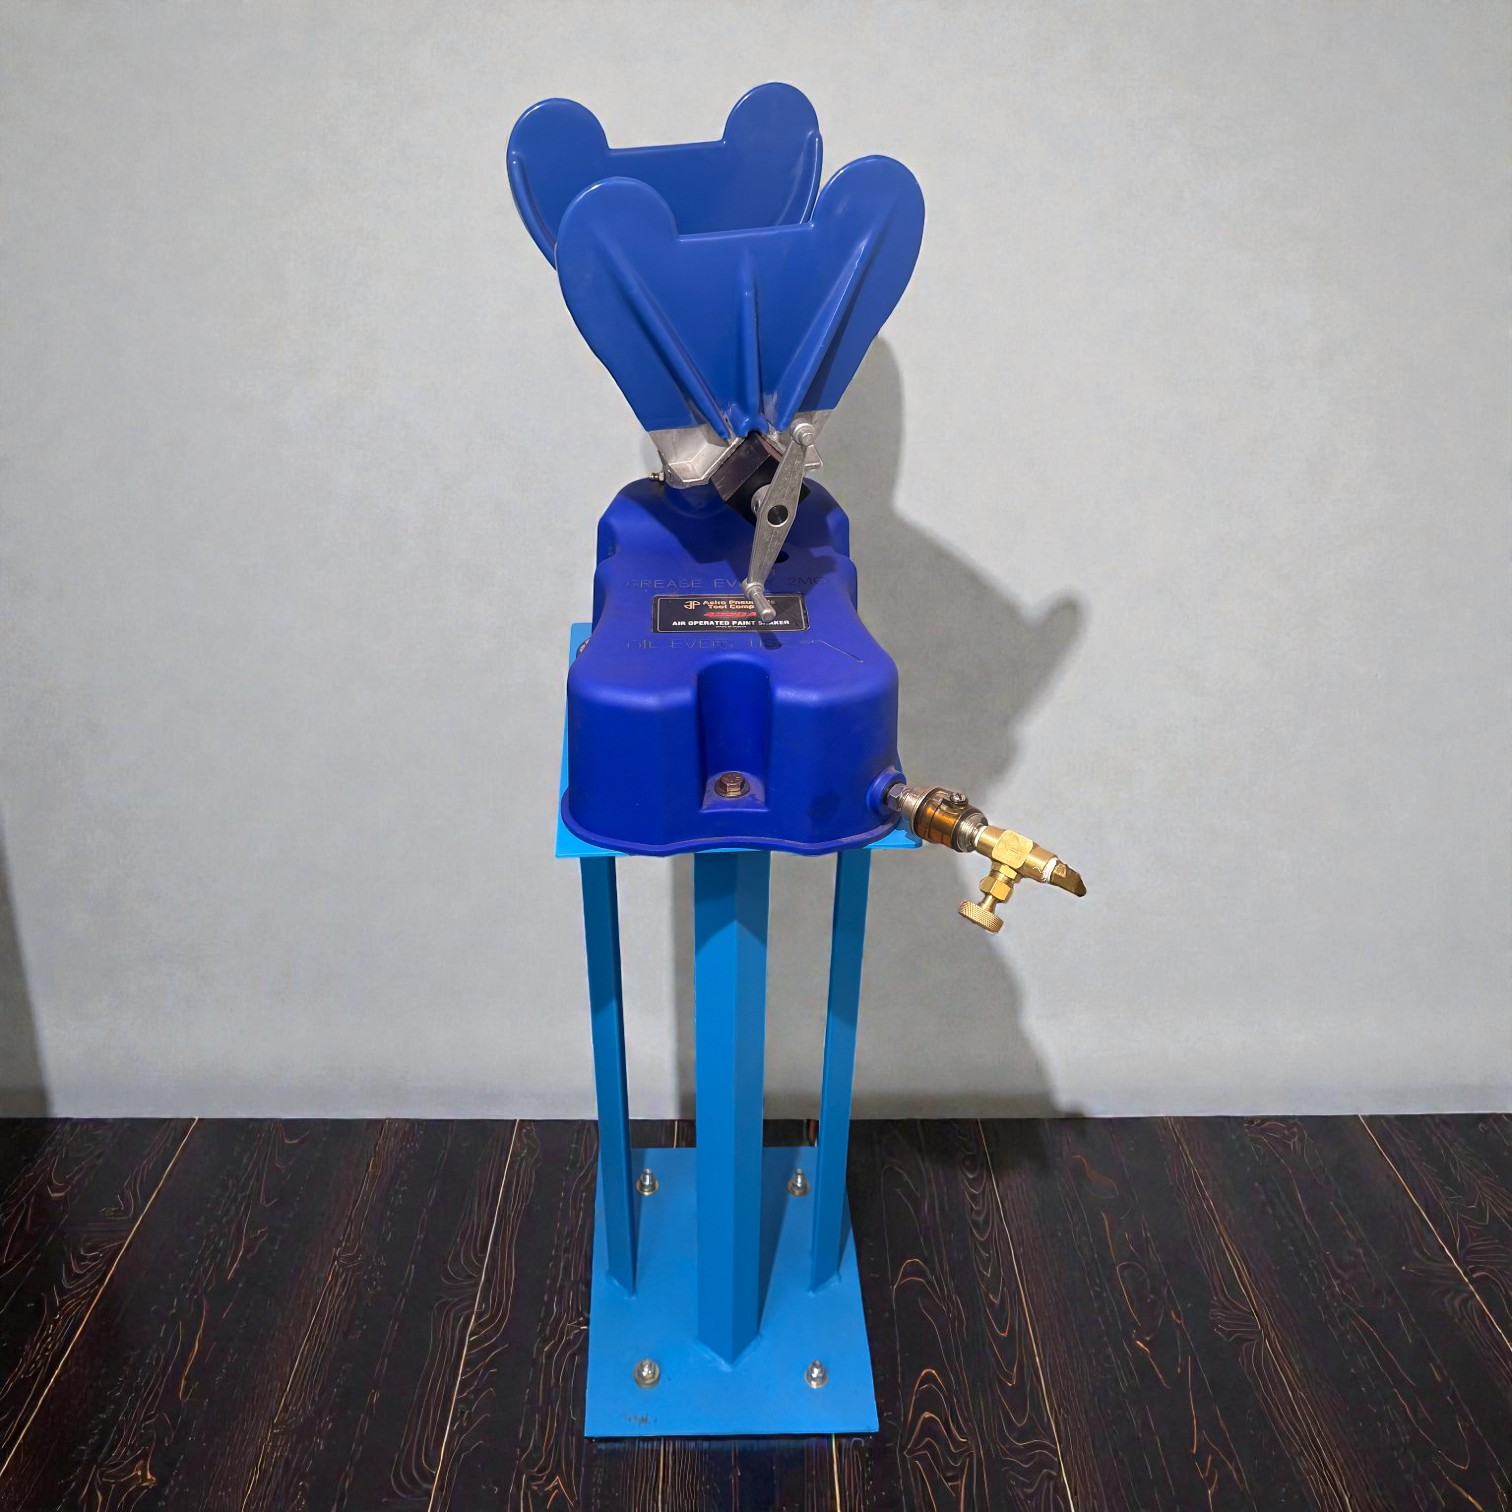
When I picked up my Astro Pneumatic 4550A Air Operated Paint Shaker, I knew right away I’d need a solid, purpose-built stand. I bought the shaker primarily to mix my Cerakote bottles, and since this machine is heavy-duty and powerful, stability and control were critical. Here’s the full build process—from raw steel to the finished, powder-coated setup.
Categories
//Building a Custom Stand for My Astro Pneumatic 4550A Paint Shaker
Building a Custom Stand for My Astro Pneumatic 4550A Paint Shaker

Planning the Design
Before cutting any metal, I mapped out a simple but strong design. The stand needed to:
-
Handle the vibration of a heavy-duty pneumatic shaker
-
Be compact enough for my workspace
-
Allow me to bolt it securely to the concrete floor
-
Position the shaker at a comfortable working height
-
Provide airflow control for consistent shaker speed
The final design uses:
-
Base plate: ⅛” × 12” × 10” steel
-
Top plate: ⅛” × 12” × 9” steel
-
Legs: Four pieces of 1.5” × 1.5” × 24” angle iron
Everything was built from steel for strength and durability.
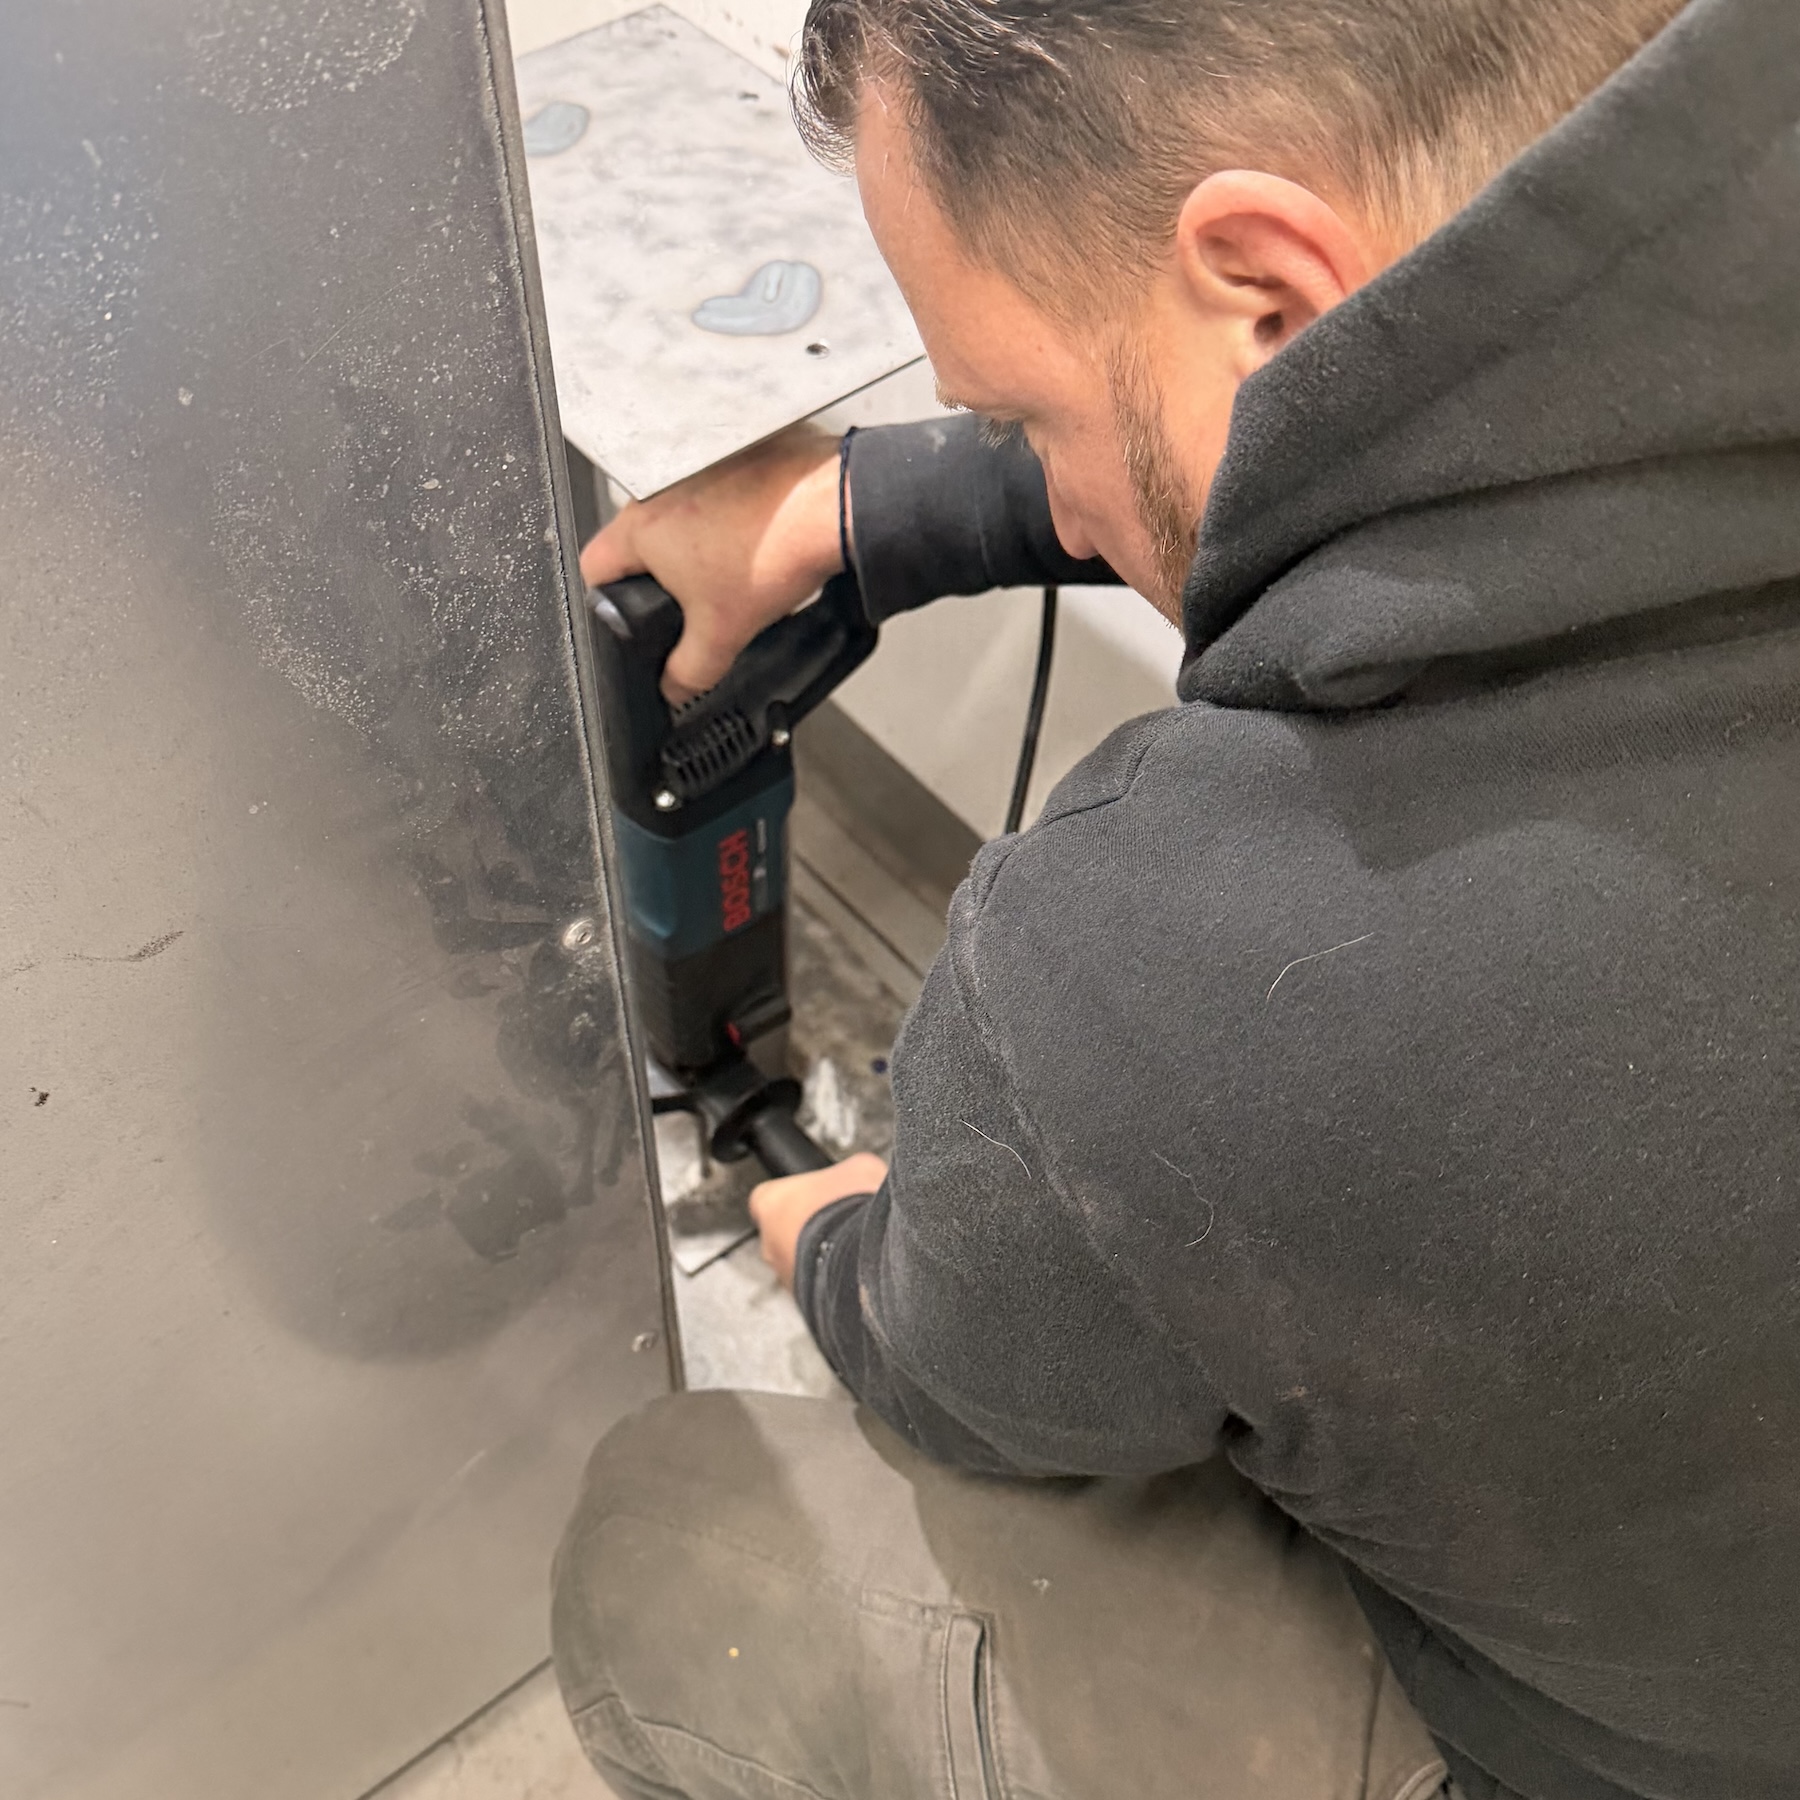
Cutting the Steel
The first step was preparing all the material.
-
The plates were cut using a cut-off tool
-
The legs were cut with a metal band saw
Once cut, everything was cleaned and prepped for welding.
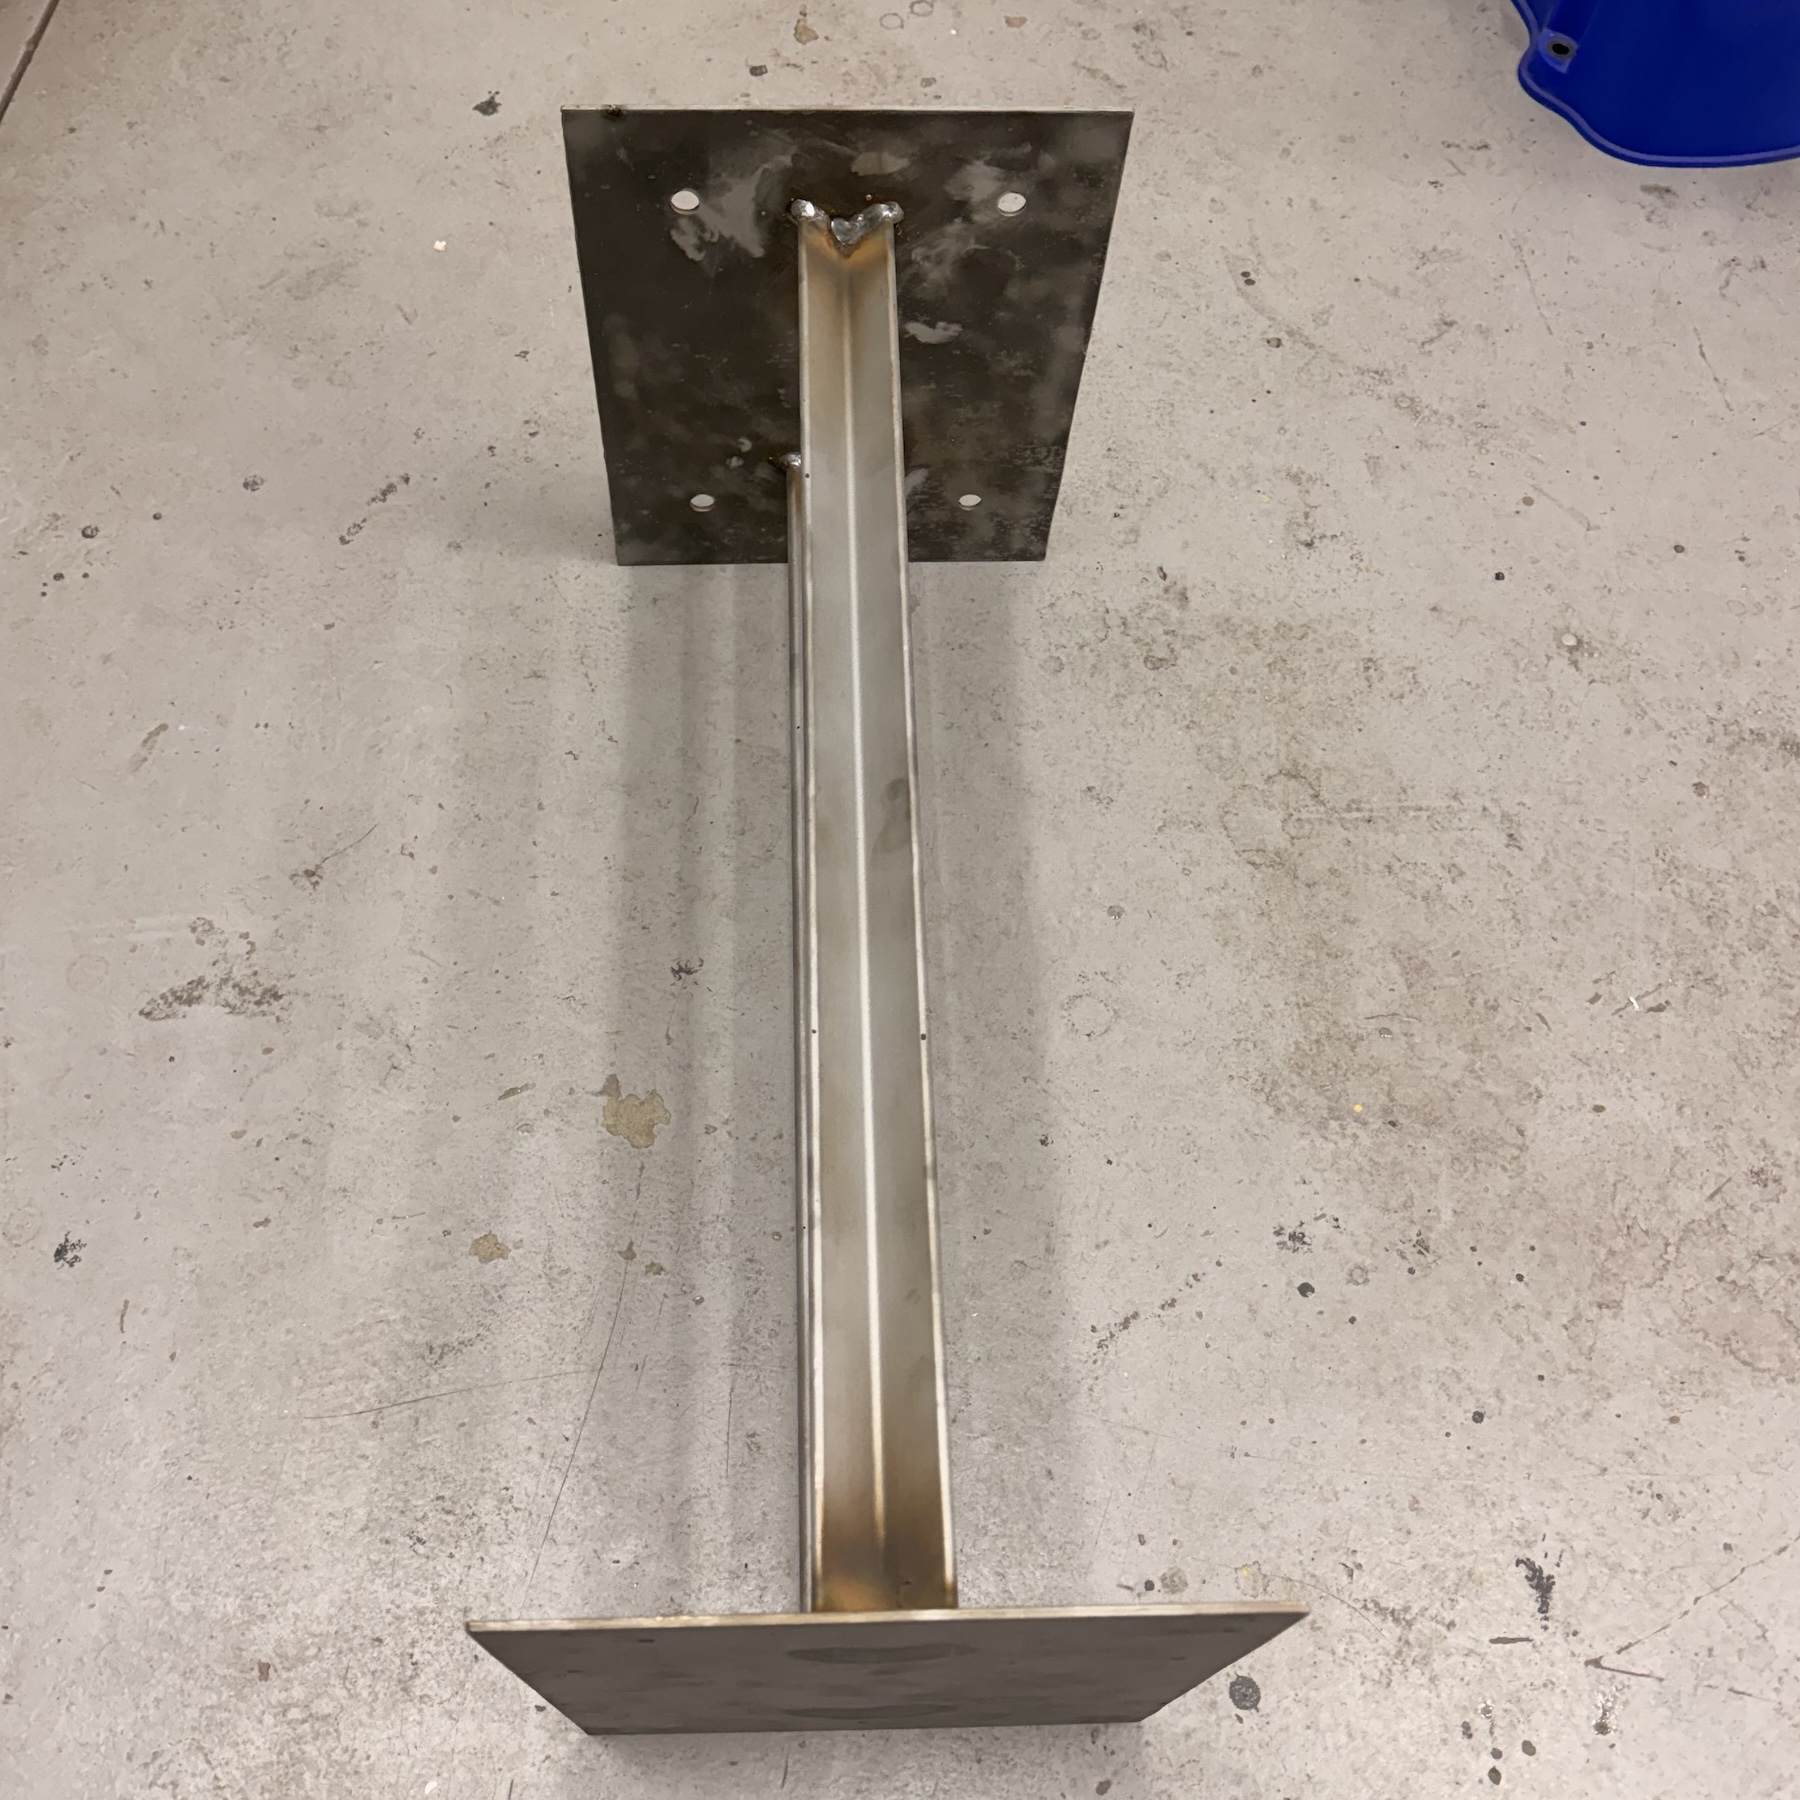
Initial Welding and First Test
I began by welding two legs to the plates using a MIG welder. At this point, the structure looked solid, but testing told a different story.
When I mounted the paint shaker and ran it, the stand shook far more than expected. The Astro Pneumatic 4550A is a serious machine, and the two-leg design simply wasn’t stable enough


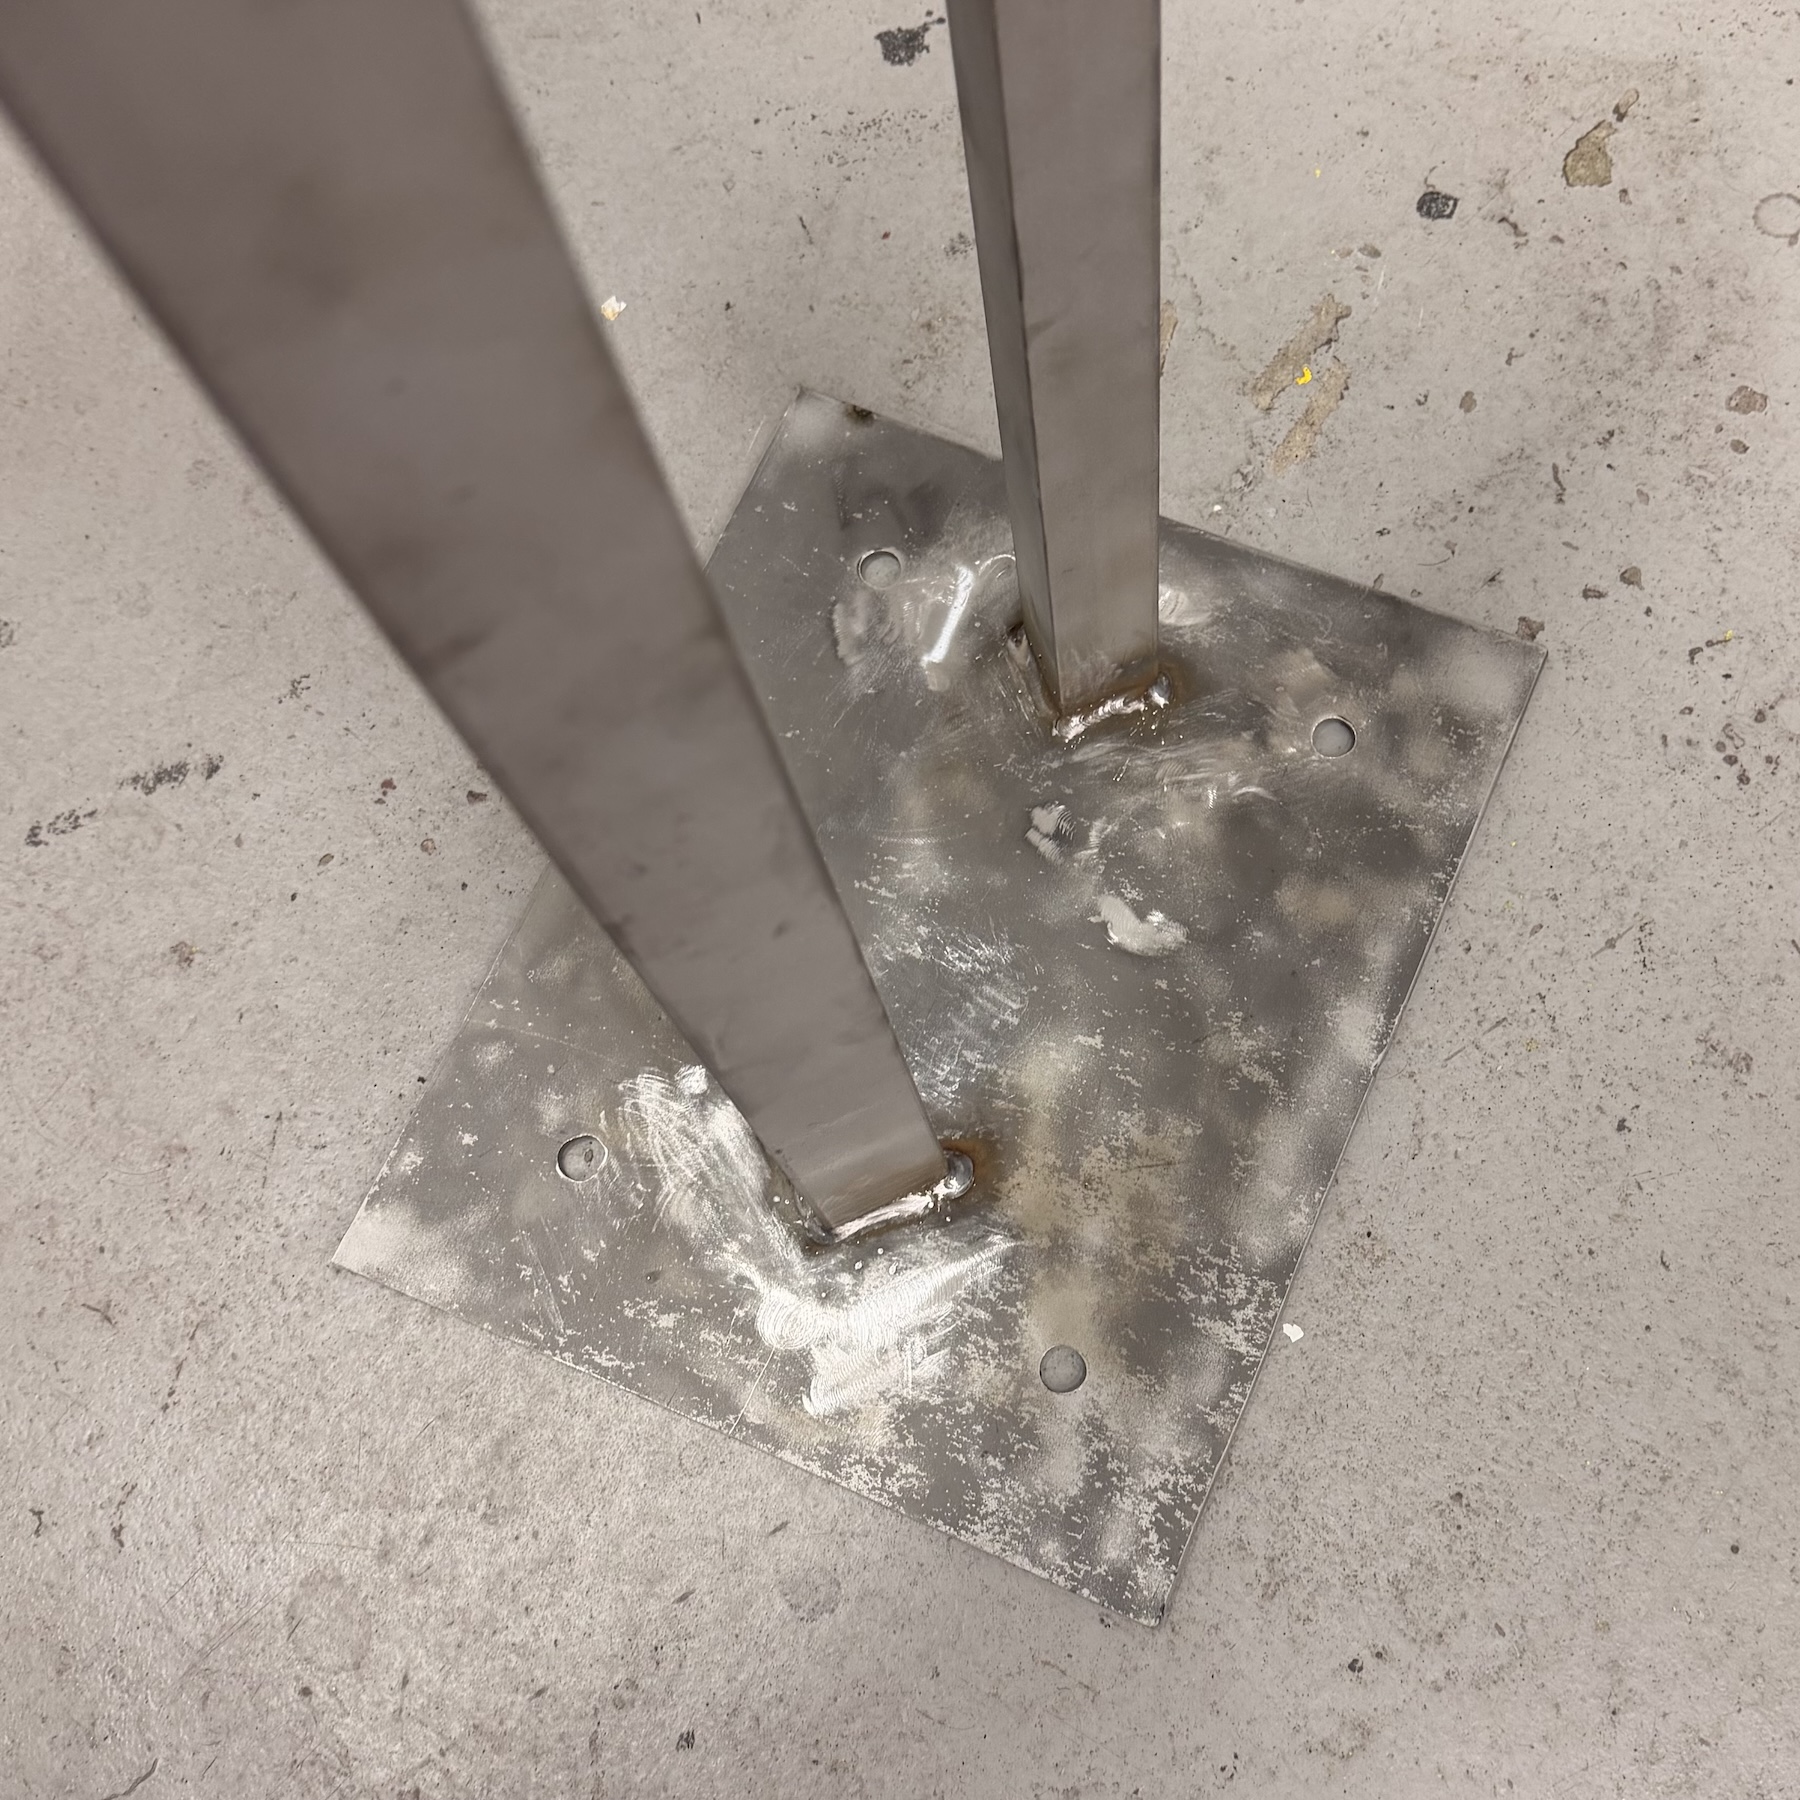
Improving Stability — Adding Two More Legs
To solve the vibration issue, I welded on two additional legs, bringing the total to four.
This made a huge difference. With four legs, the stand became much more stable, and the shaker ran smoothly without excessive movement.
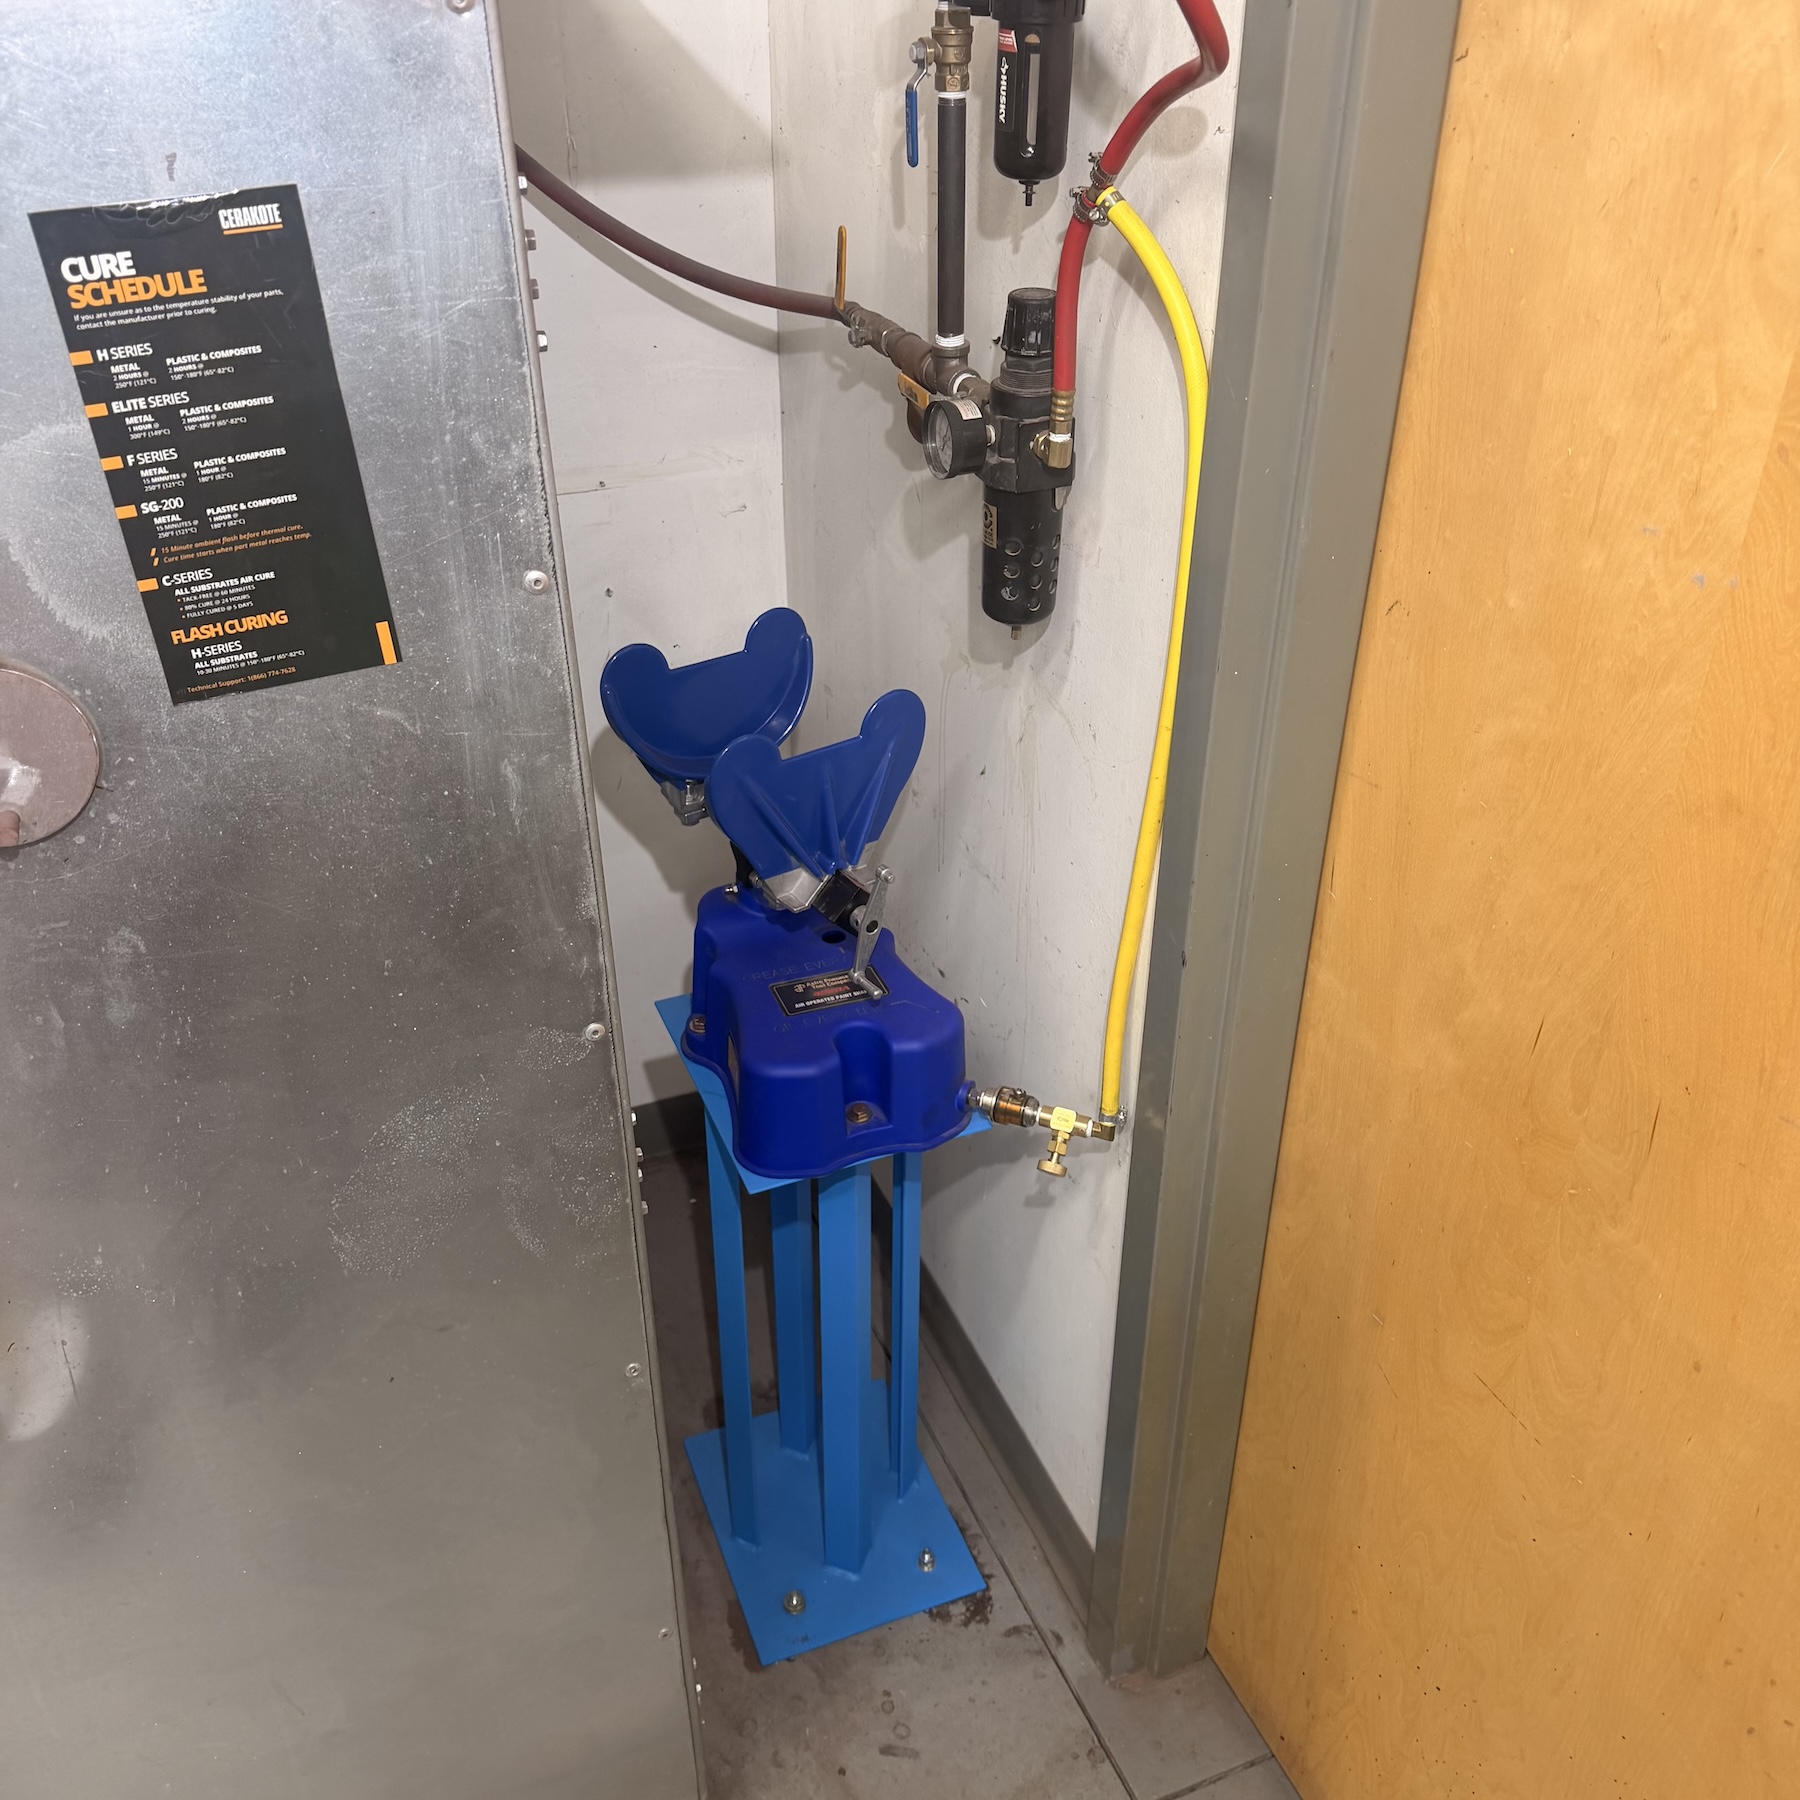
Anchoring the Stand to Concrete
To completely eliminate any shifting, I bolted the stand directly to the concrete floor.
-
Used four 3/8” concrete anchors
-
Drilled holes using a Makita rotary hammer drill with a concrete bit
Once anchored, the stand felt rock solid—even under full shaker operation.


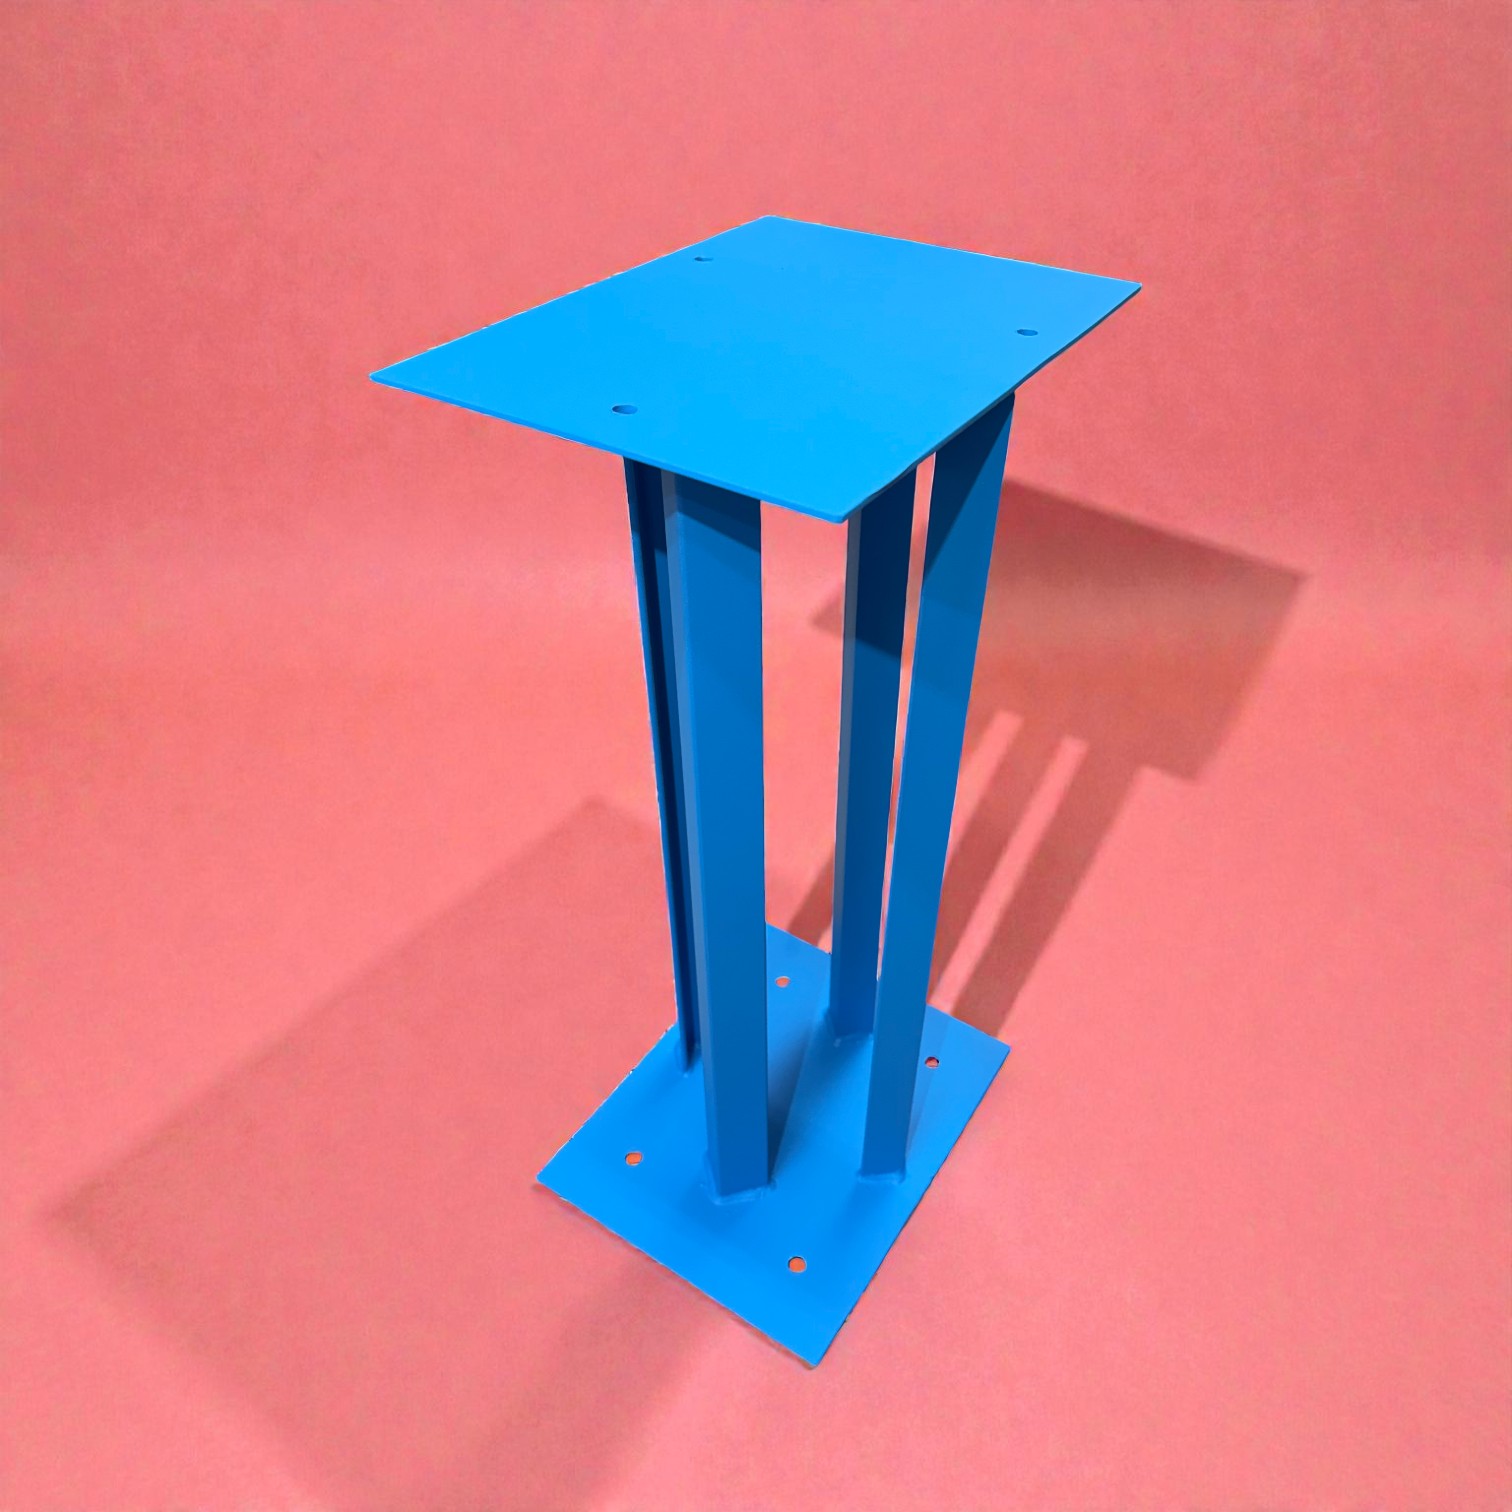
Powder Coating Finish
After fabrication was complete, I had the stand powder coated.
-
Color: Prismatic Powder Rainbow Blue
-
Applied two coats
This not only gave the stand a clean, professional look but also protects the steel from wear and corrosion.


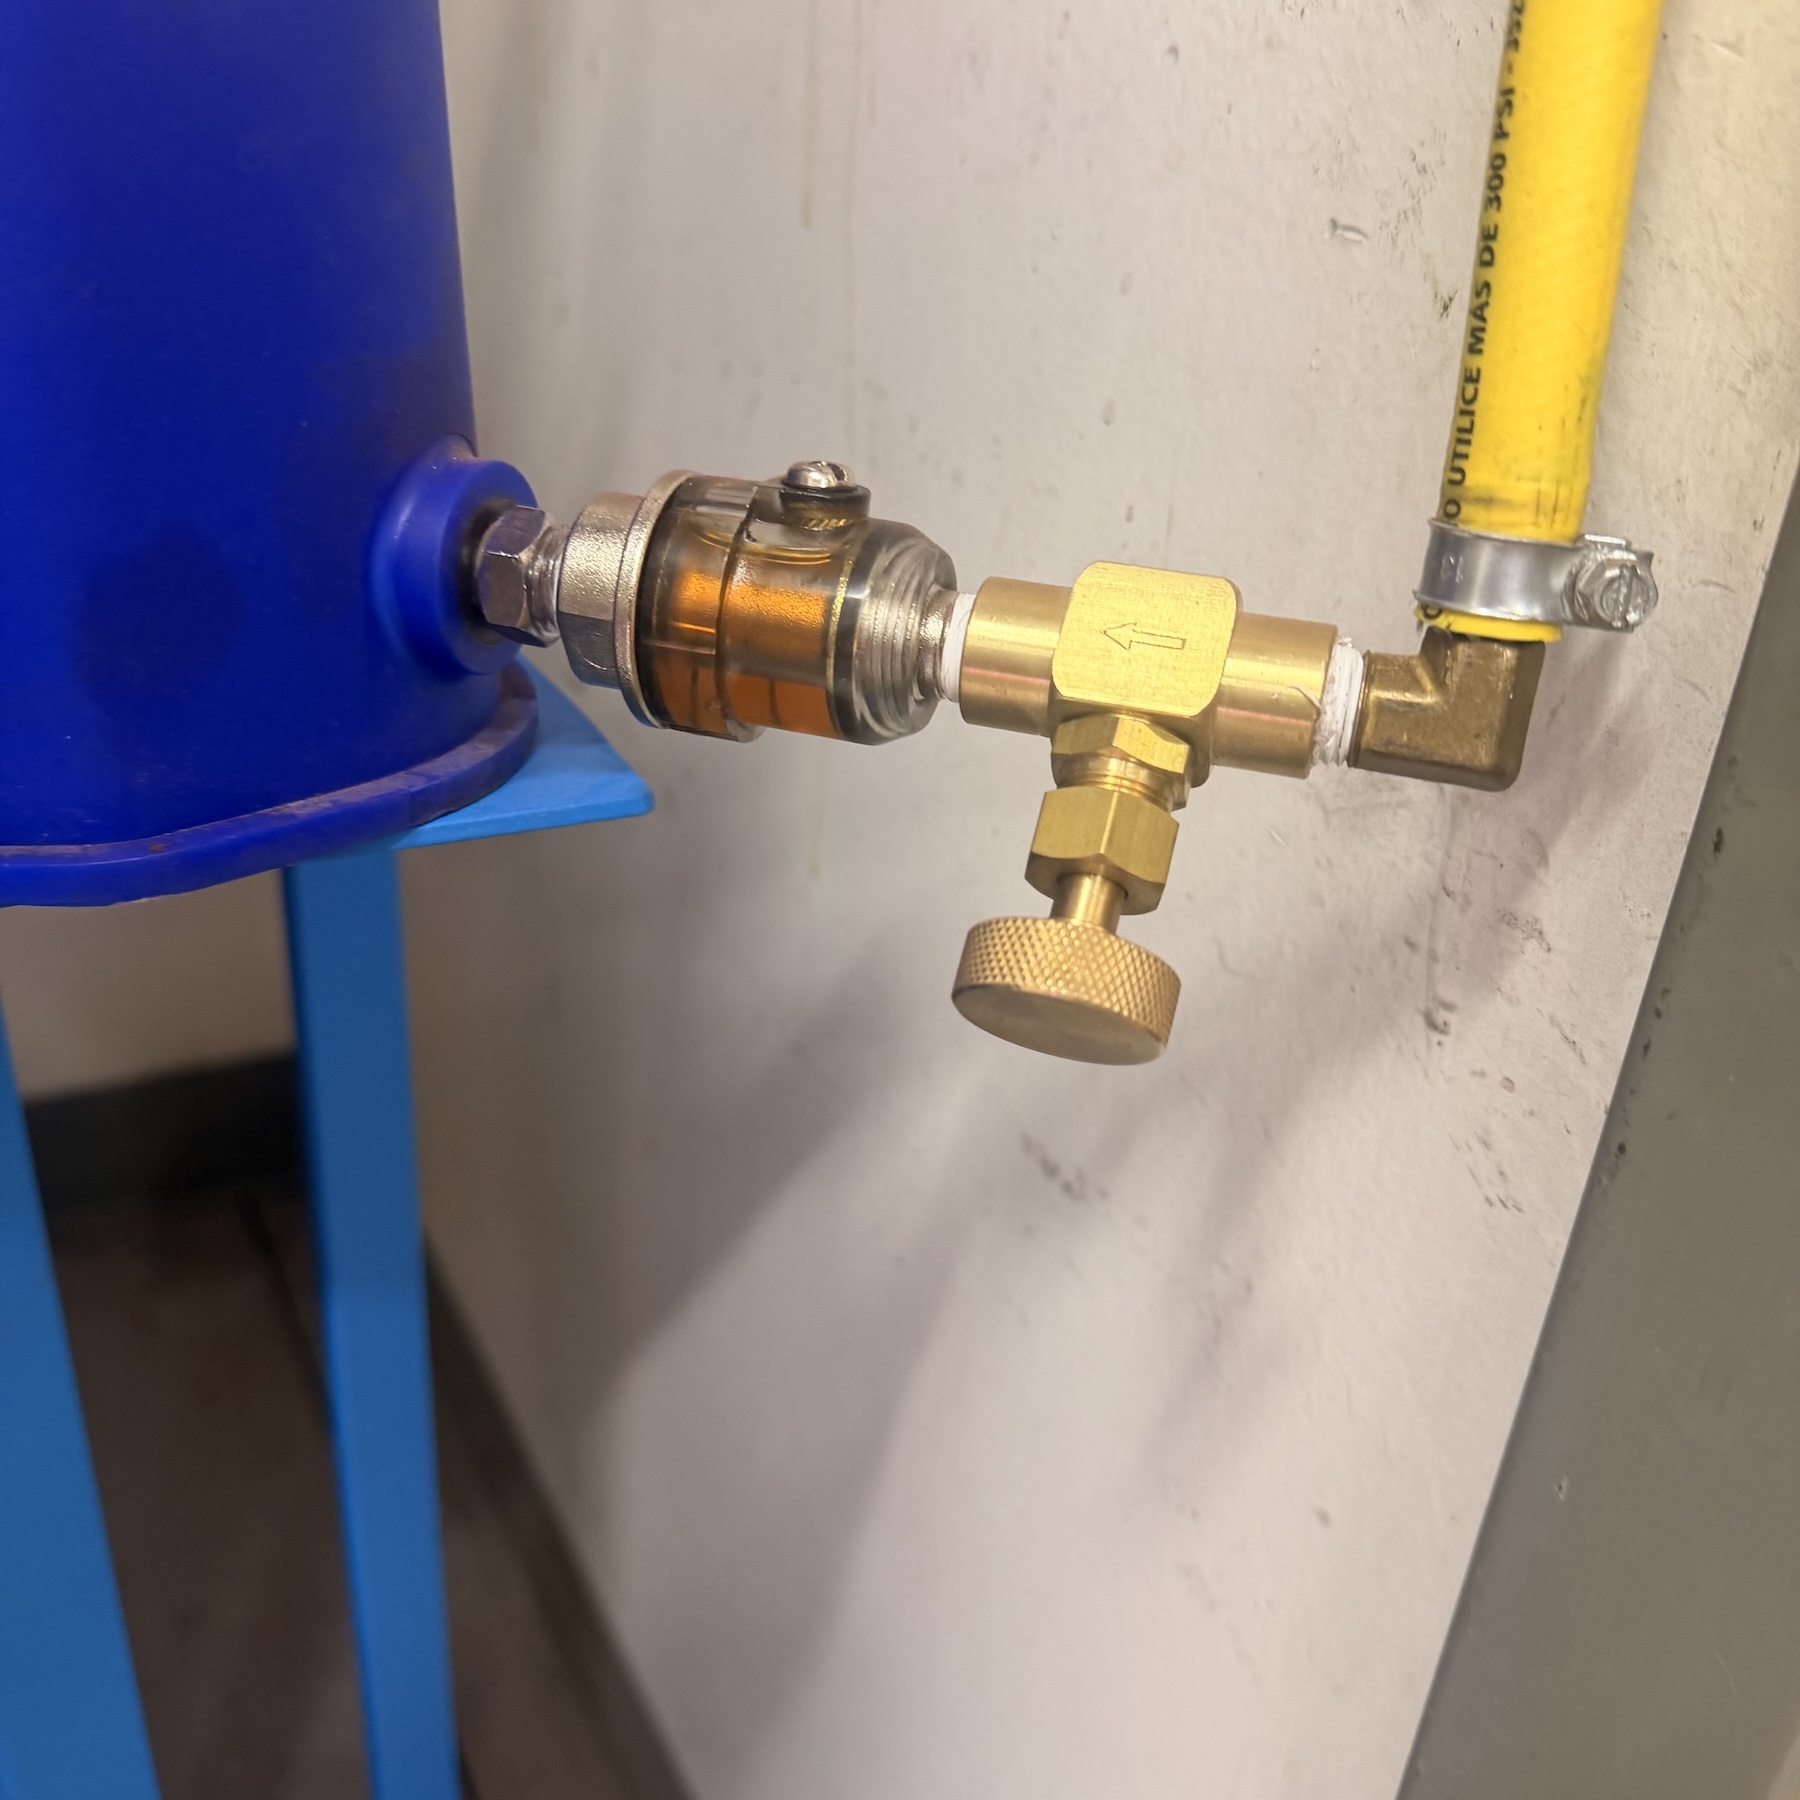
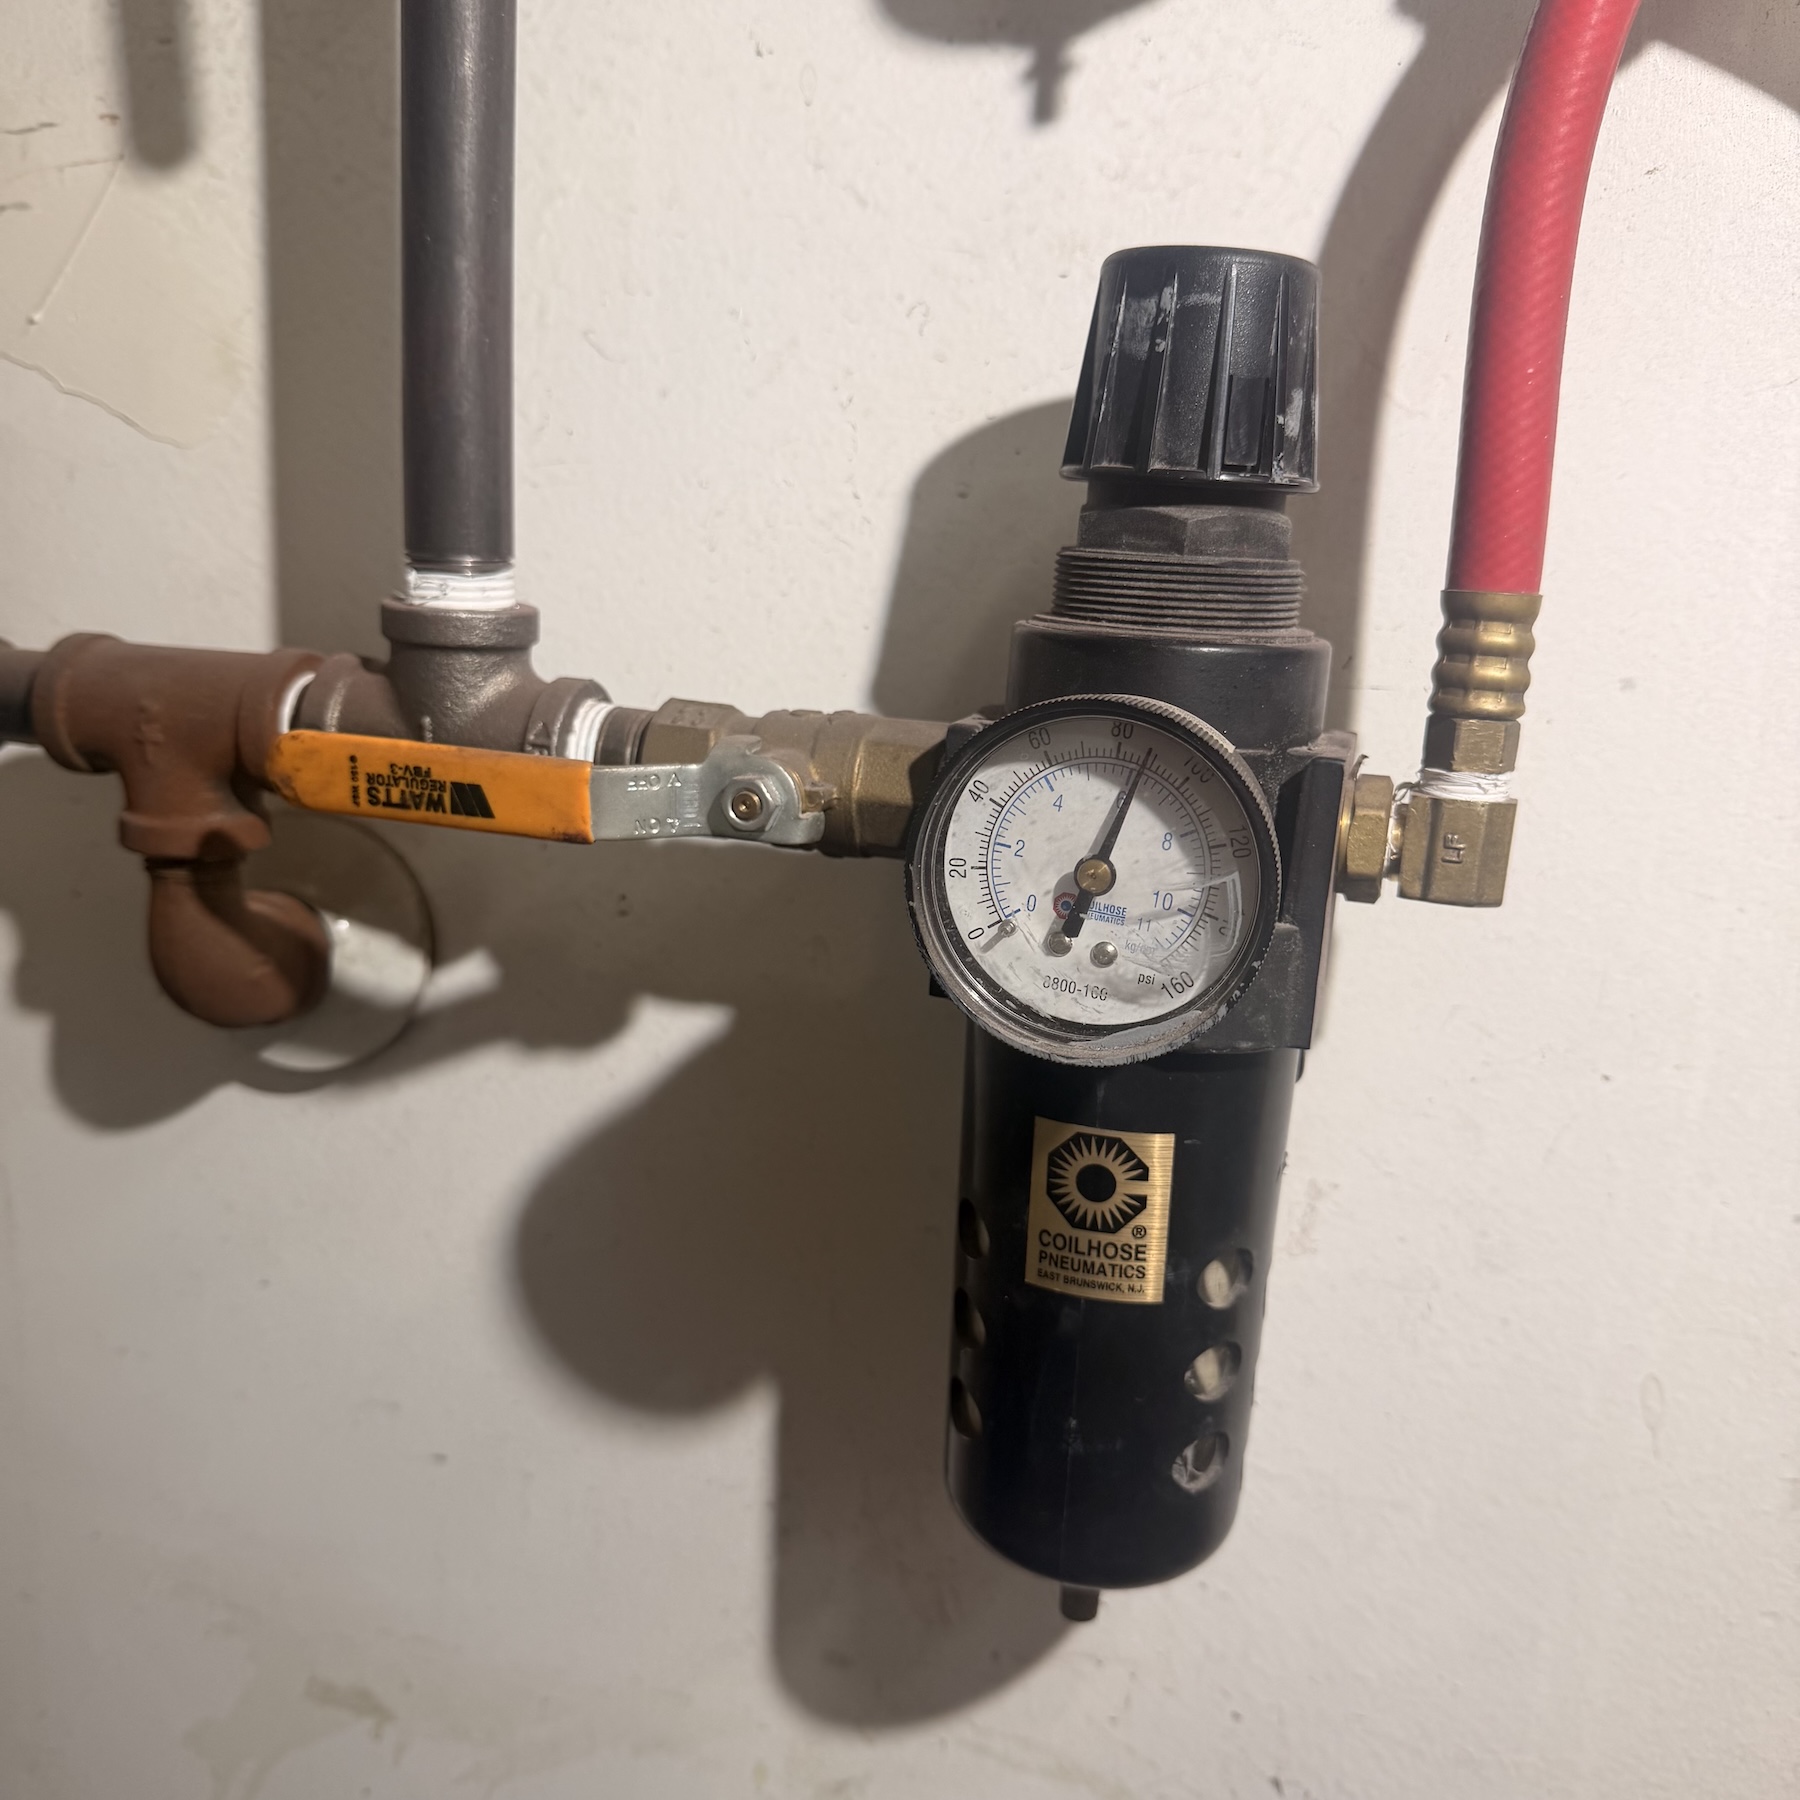
Air System Setup and Speed Control
To run the pneumatic shaker properly, I tied it into my existing air system.
-
The air line comes after an air regulator
-
I split the line with a brass T from my air gun line, which runs at 90 PSI (the same pressure required by the shaker)
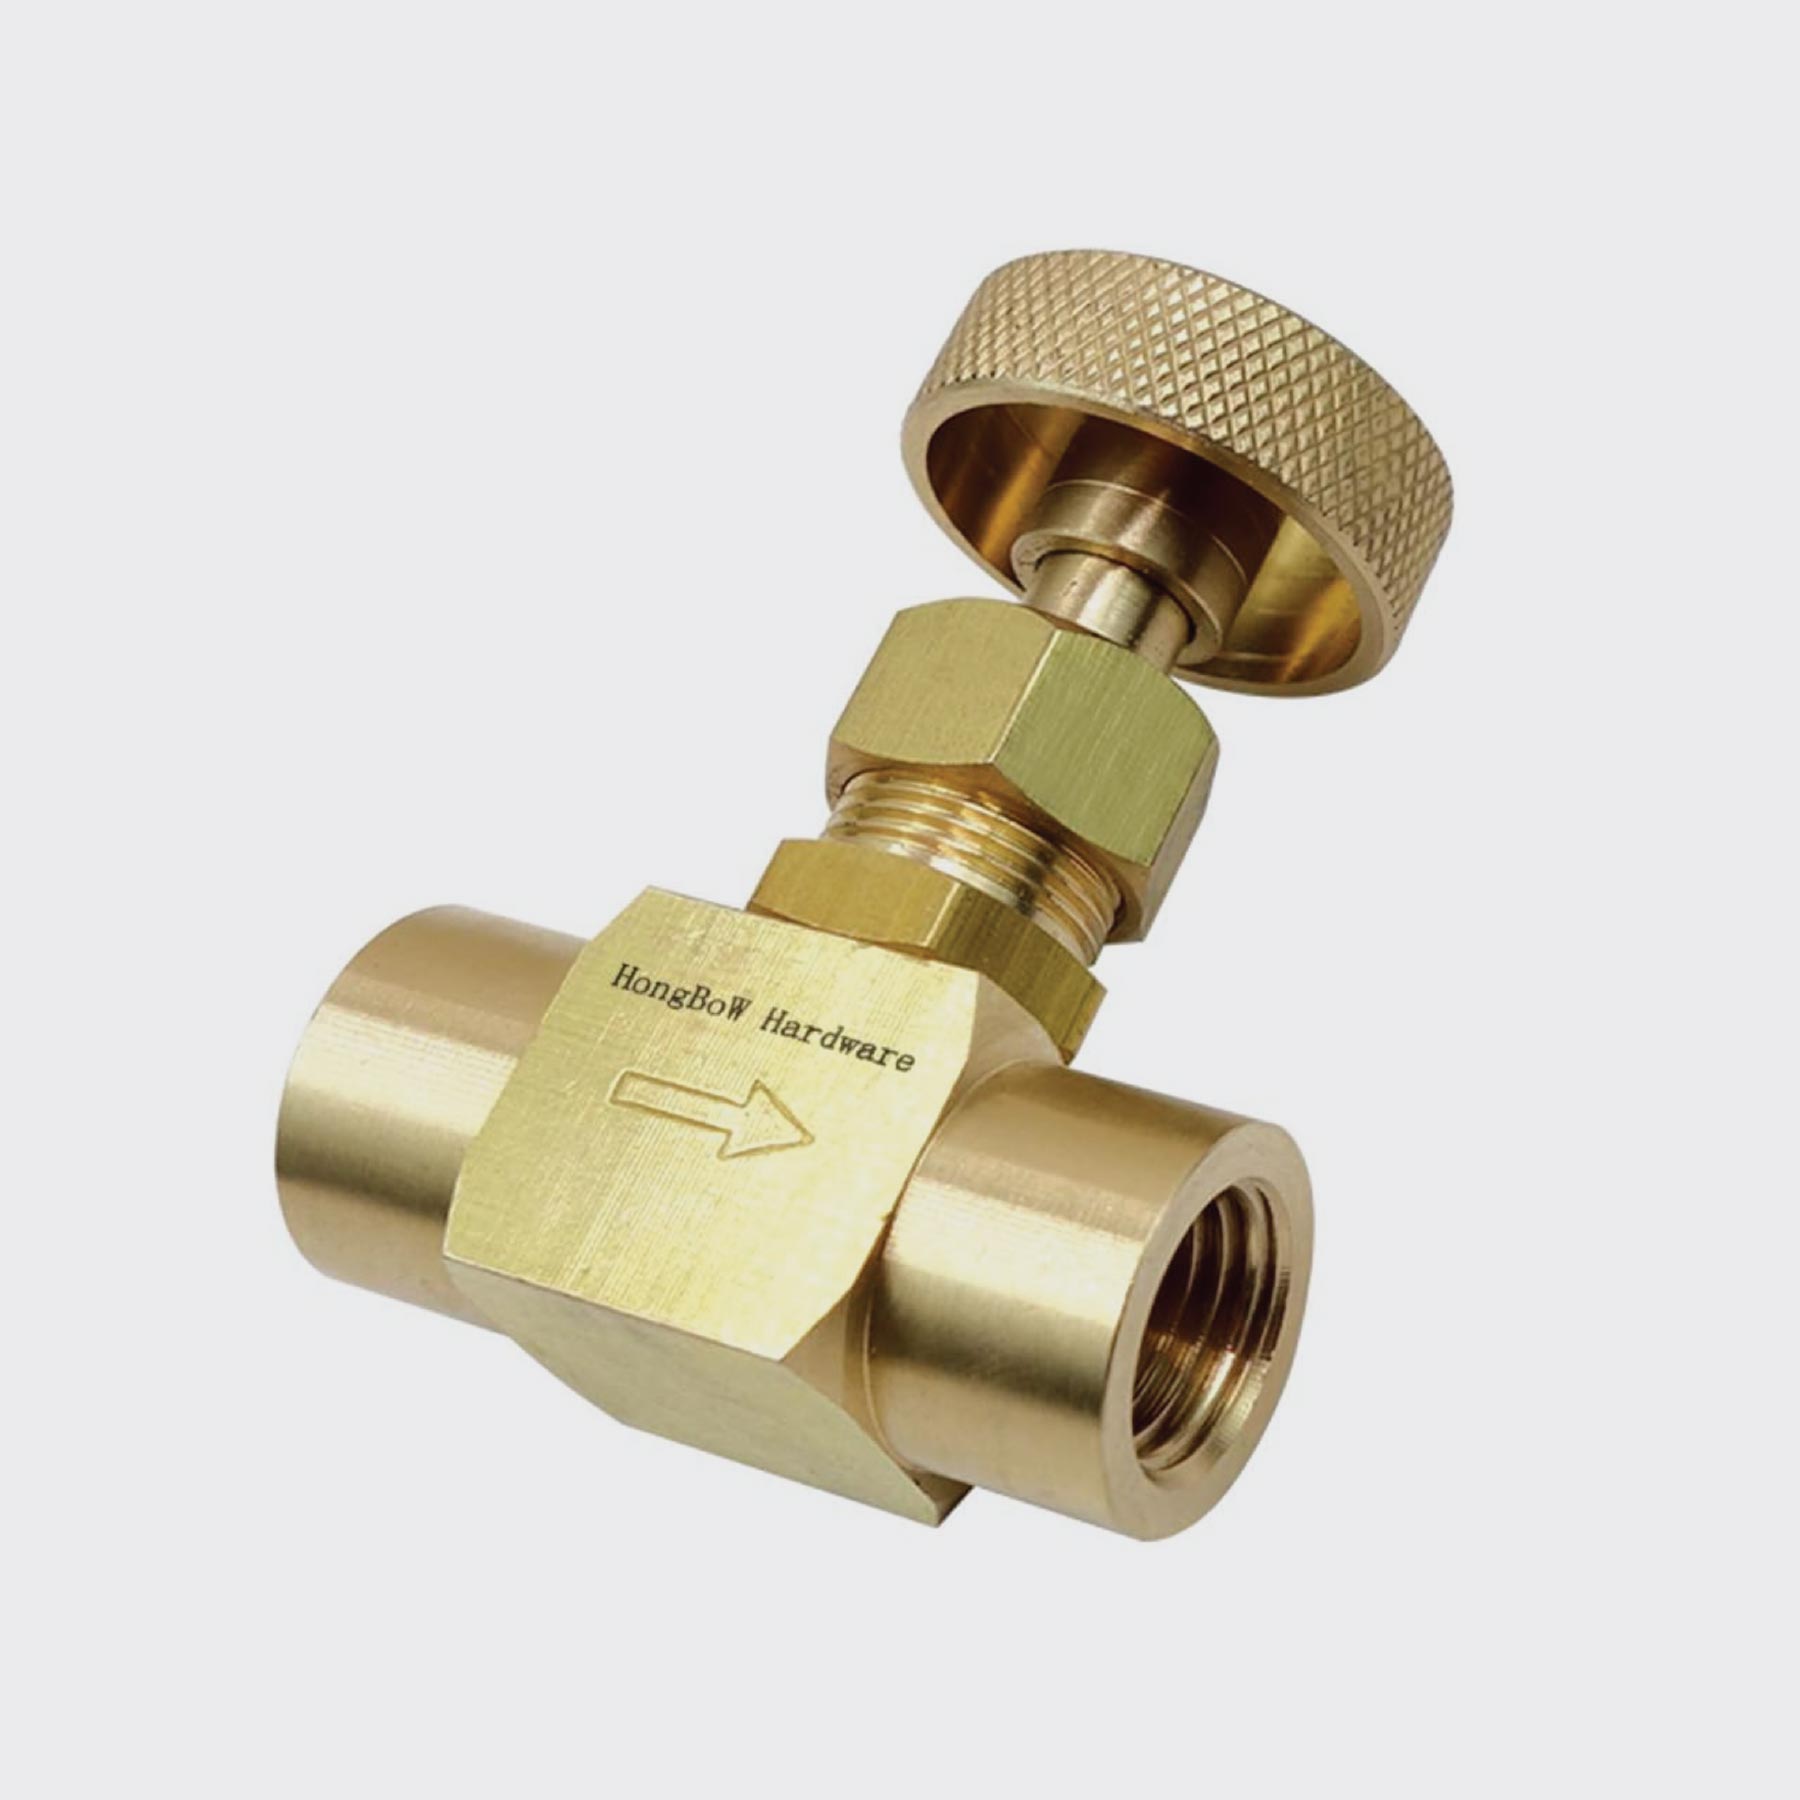
To improve control, I installed a:
Instrument Brass Needle Valve (1/4″ NPT Female x 1/4″ NPT Female, 600 PSI)
This allows me to fine-tune airflow and easily regulate the shaker speed.


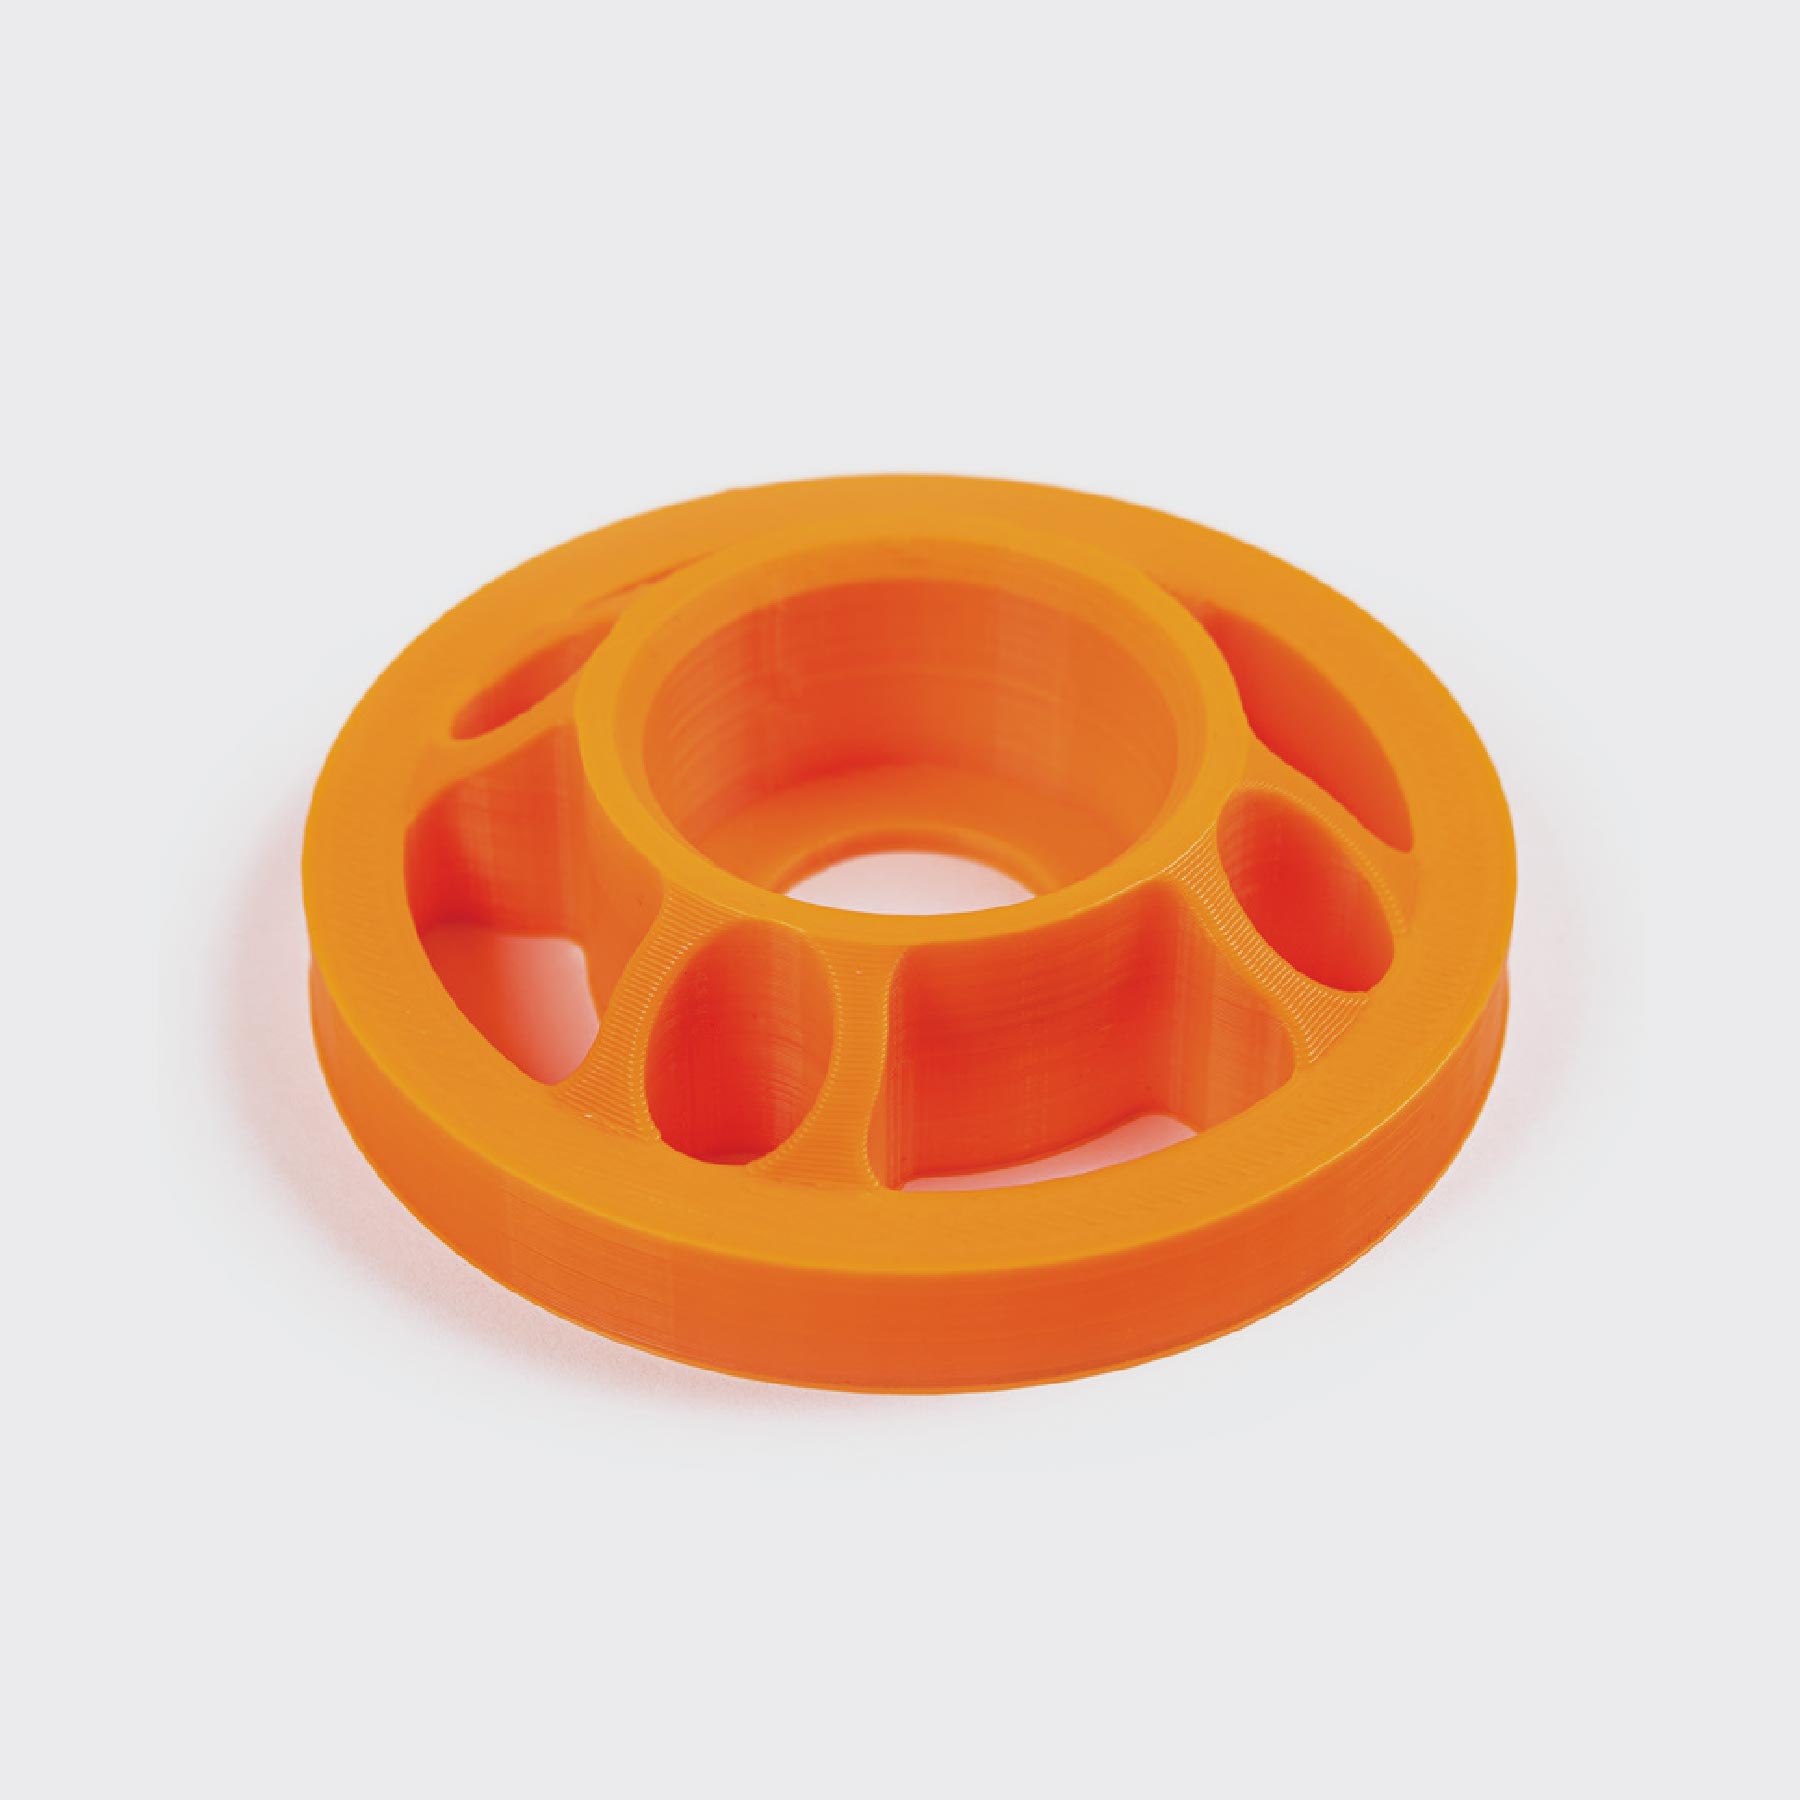
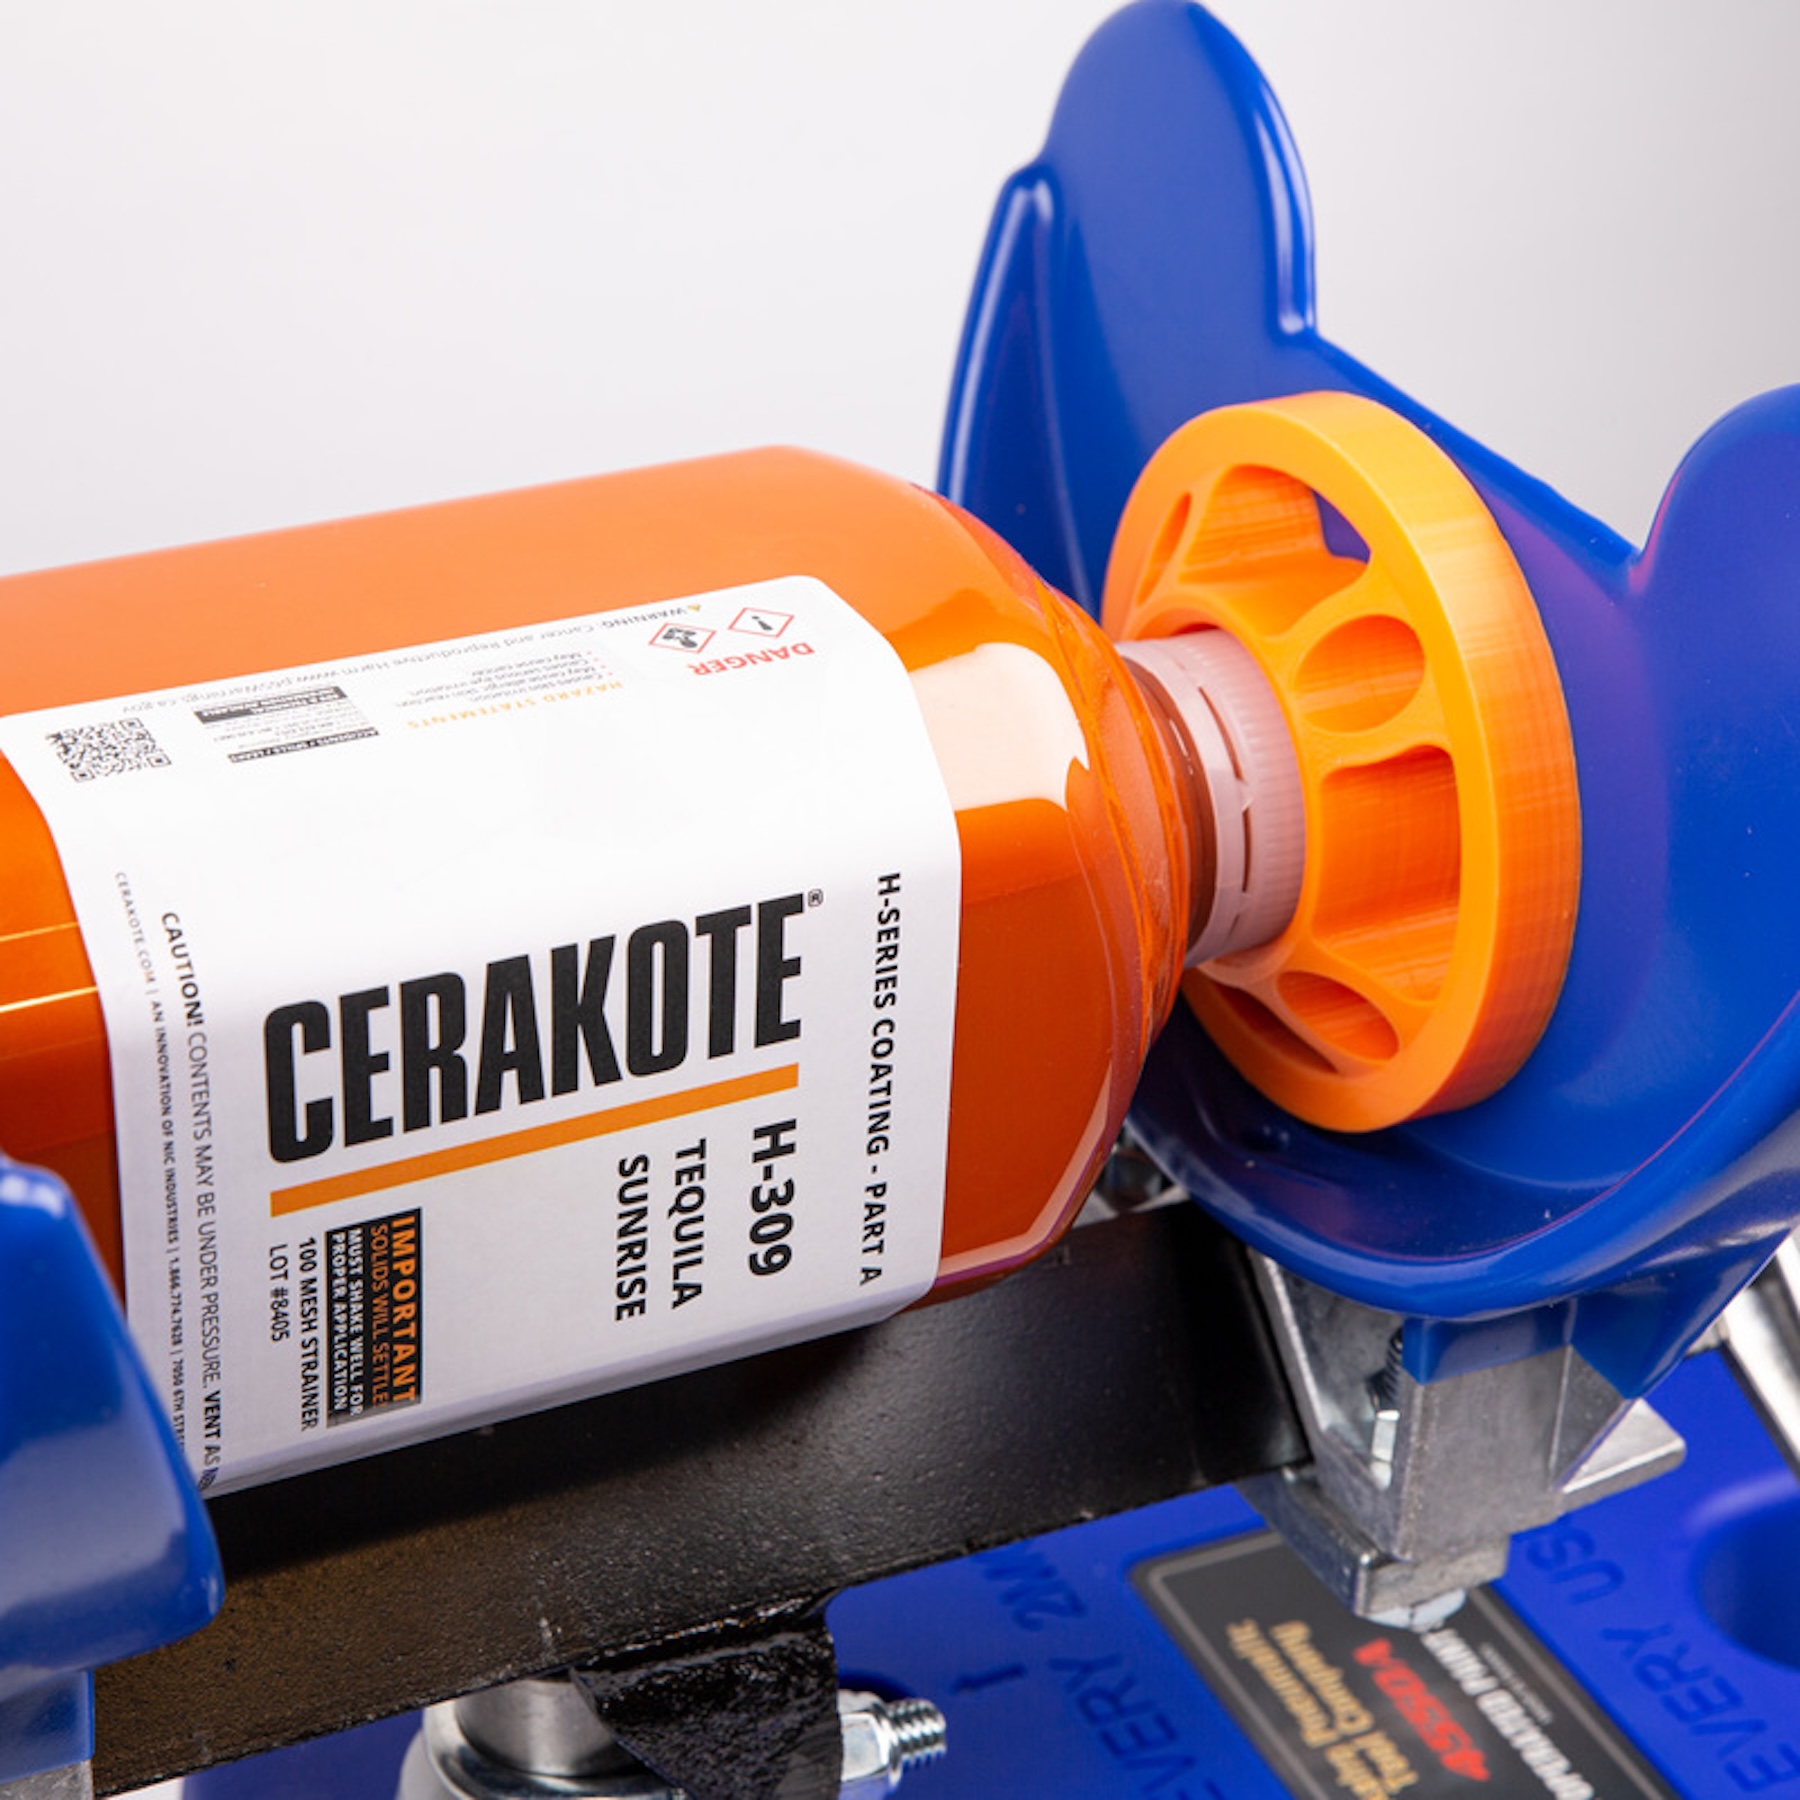
Bottle Adapter for Cerakote
Since the shaker clamps are designed for gallon cans, I added a Paint Shaker Adapter so I can securely hold my Cerakote bottles during mixing. This made the shaker far more practical for my actual use.


Final Result
After all the fabrication, testing, and adjustments, the stand turned out exactly how I wanted:
-
Strong steel construction
-
Extremely stable under heavy vibration
-
Clean, durable powder-coat finish
-
Adjustable shaker speed via needle valve
-
Perfect for mixing Cerakote bottles
This build was a great reminder that sometimes the first design isn’t the final one—but with testing and refinement, you end up with something far better.
If you’re running a heavy-duty pneumatic shaker, don’t underestimate the importance of a solid stand and proper anchoring. It makes all the difference in performance, safety, and usability.
- 32 views