
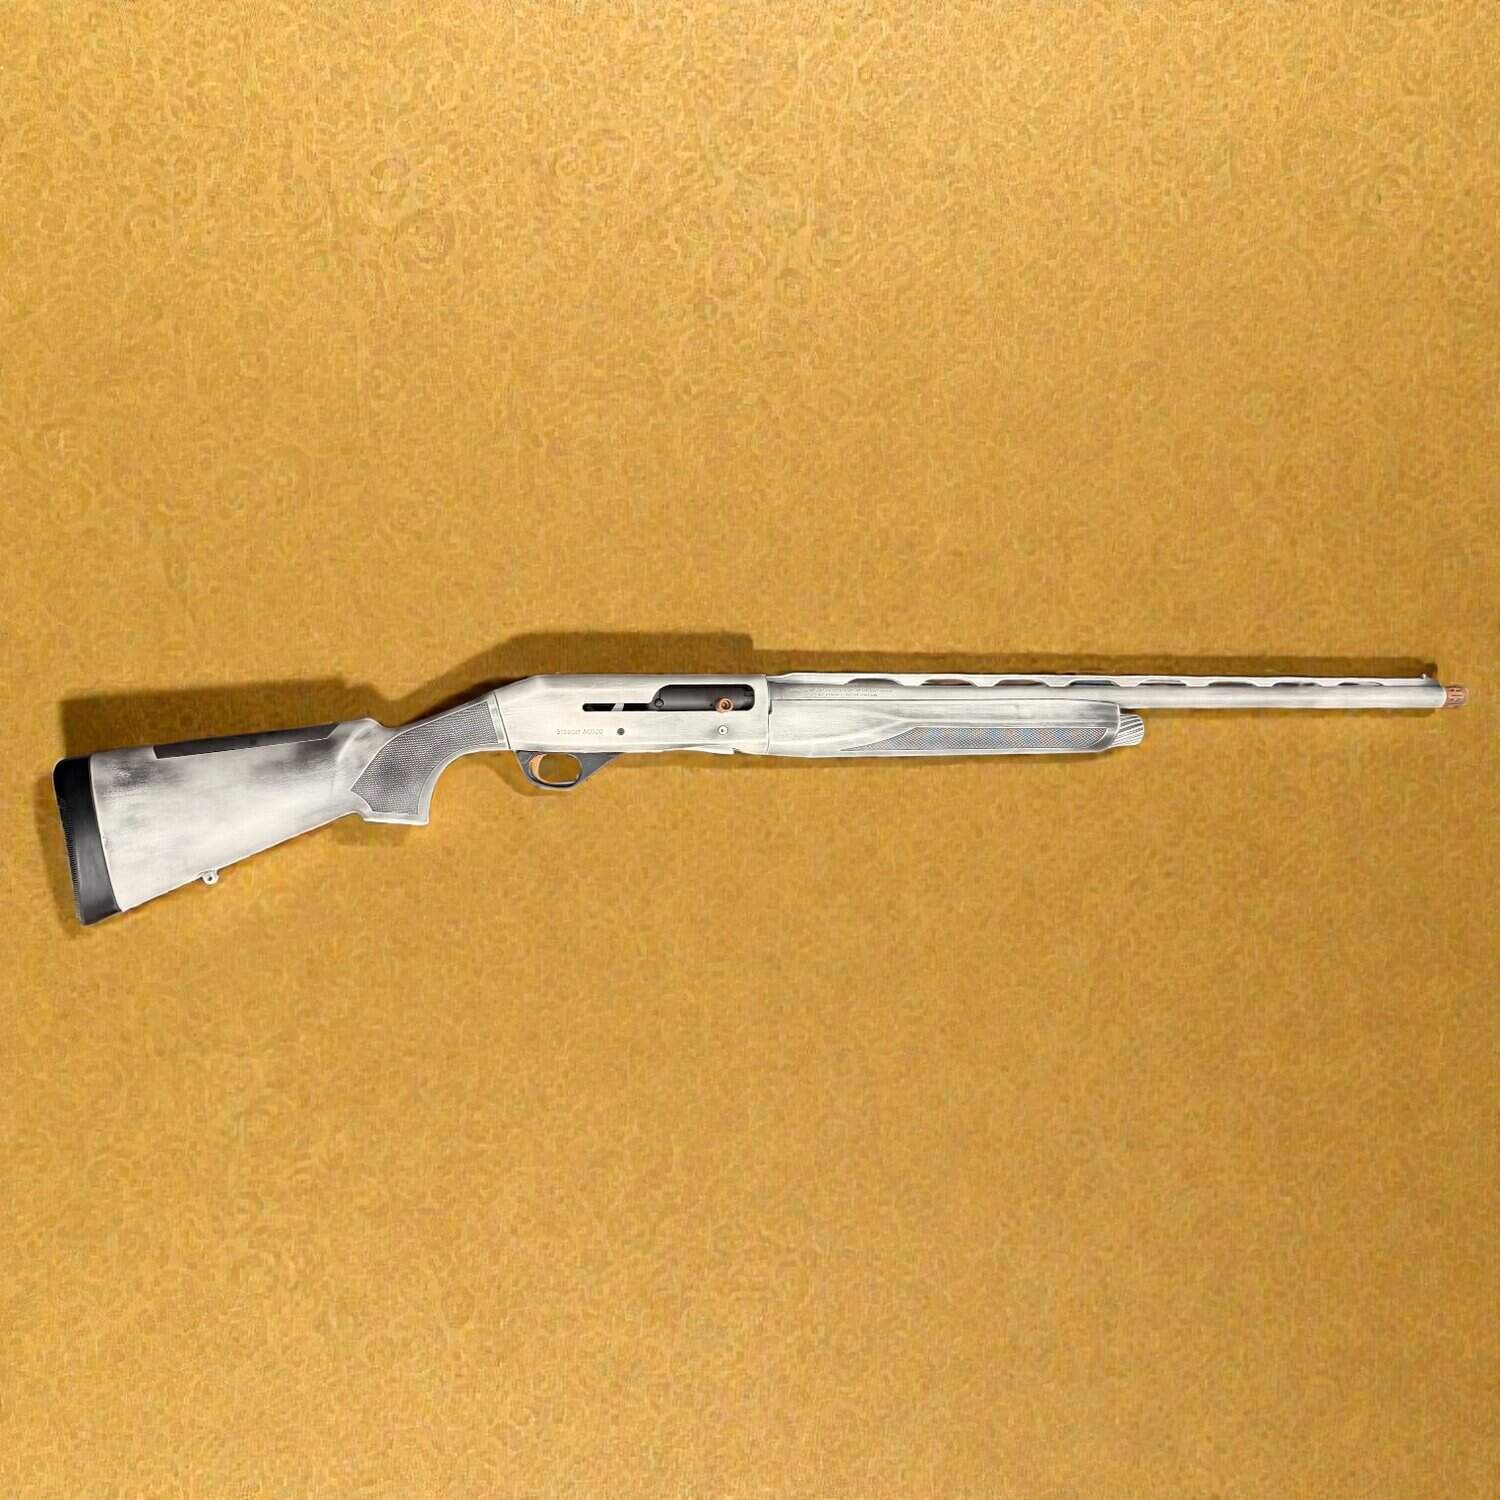
//Stoeger M3500 Shotgun Battleworn Frost
Stoeger M3500 Shotgun Battleworn Frost


Project Details
Custom Stoeger M3500 Cerakote featuring Frost White distressed finish, copper accents, careful preparation, Elite coatings, and gunsmith disassembly and reassembly.S2. -
Custom Cerakote Project – Stoeger M3500 Shotgun (Frost White / Distressed Battleworn / Copper Accents)
Initial Condition and Disassembly
The shotgun arrived in very dirty condition, with heavy fouling, oil saturation, and residue built up across both metal and polymer components. Before any coating work could begin, my gunsmith fully disassembled the shotgun to ensure each part could be properly cleaned, prepared, coated, and later reassembled safely and correctly.

Deep Cleaning and Surface Preparation
Because of the level of contamination, thorough degreasing was critical. All metal parts were soaked in acetone to draw out embedded oils and carbon buildup. Polymer parts such as the stock and handguard were cleaned separately using soap and water to avoid damage from harsh solvents.
Once cleaned, all parts scheduled for coating were sandblasted to remove the original finish and create a proper surface profile for Cerakote adhesion. After sandblasting, the parts were placed in the oven and off-gassed at 400°F for 45 minutes to burn out any remaining oils trapped in the metal. Due to how dirty and oil-saturated this firearm was, some components required a second off-gassing cycle followed by another light sandblast to ensure a completely clean and stable surface.
Addressing Outgassing Issues
During early coating stages, a few components—particularly the barrel and choke tube—experienced bubbling in the Cerakote during curing. This was caused by residual gases escaping from the metal under heat. When this happens, the only proper fix is to strip the affected area, repeat the cleaning and off-gassing process, and recoat. Taking the extra time here ensures long-term durability and a professional finish.
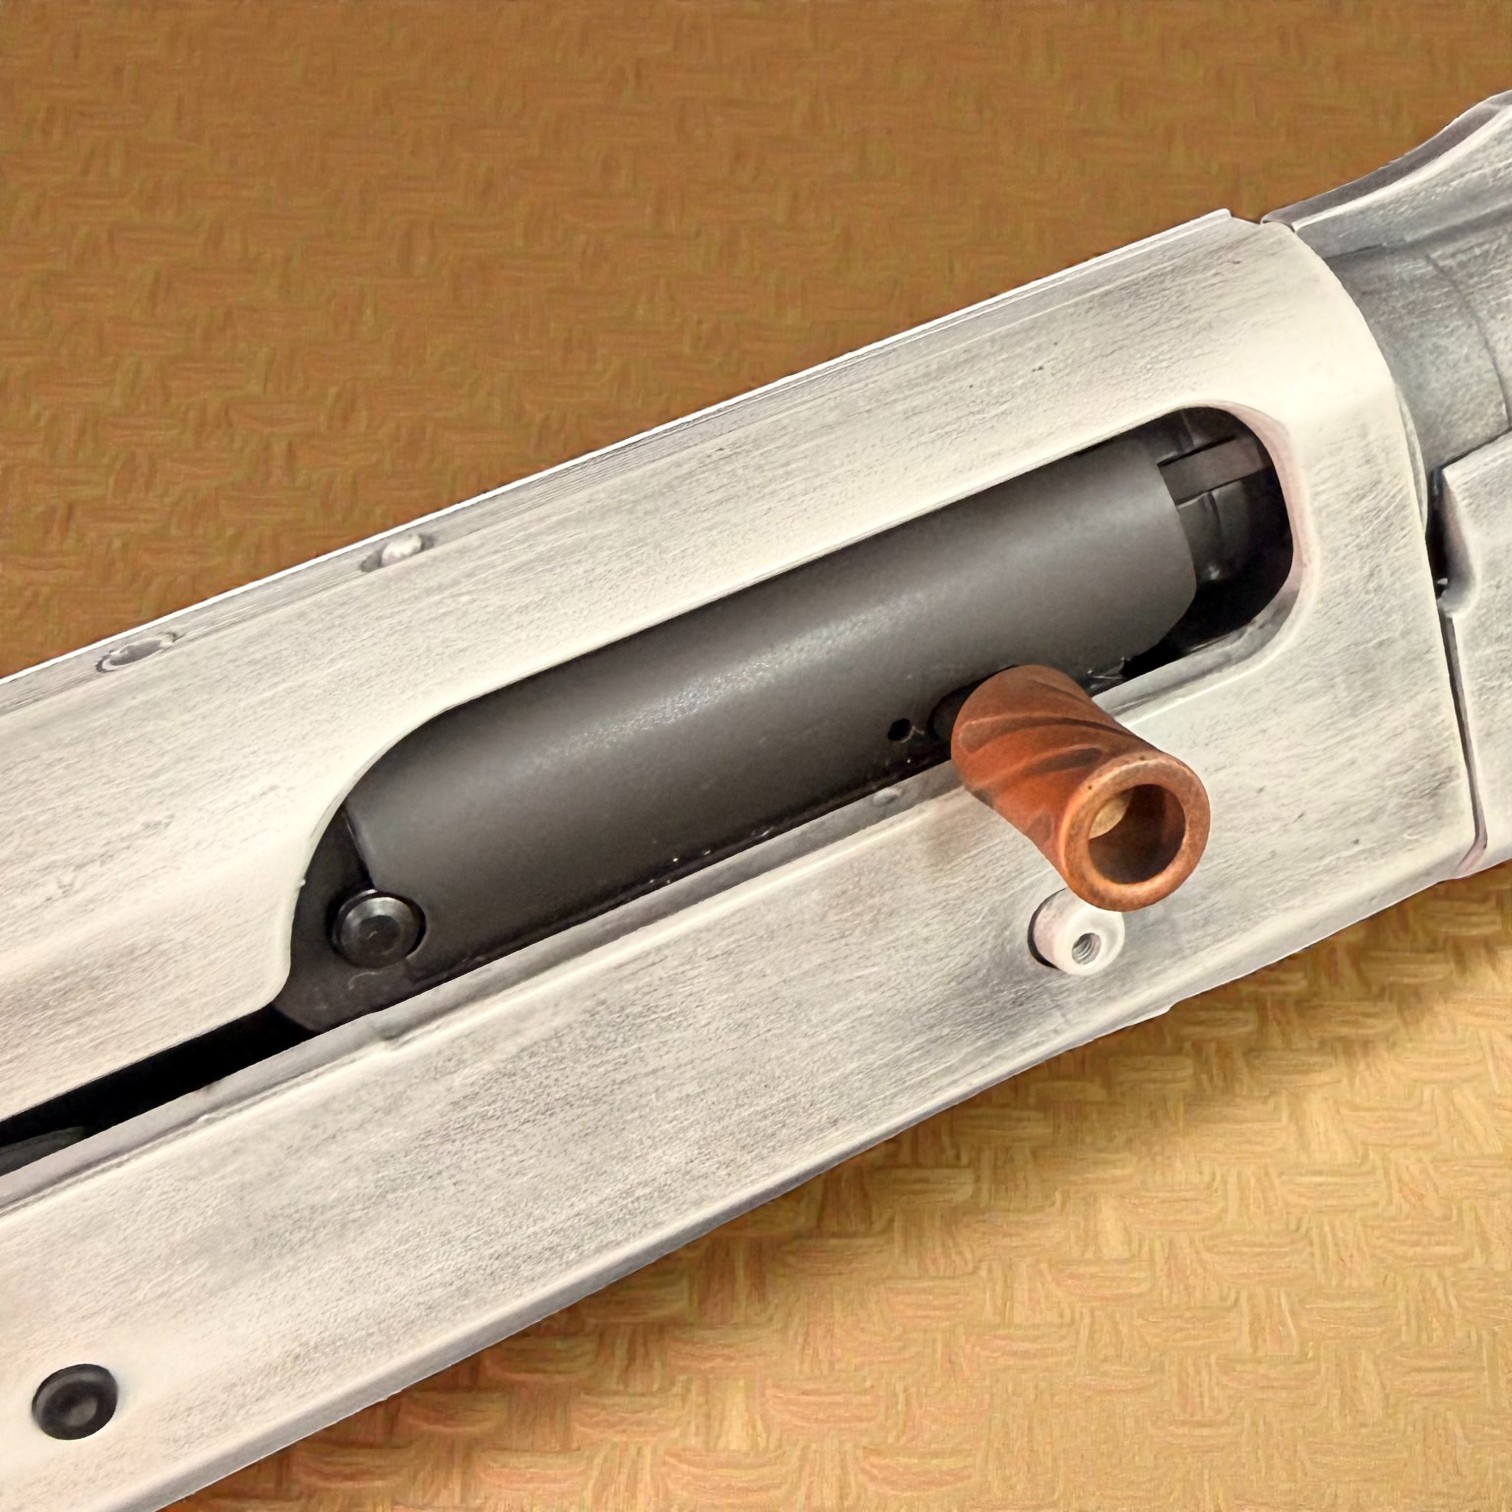
Elite Series Blackout – Interior Receiver
The first coating applied was Cerakote Elite Series (E-Series) Blackout on the interior of the receiver. This coating was chosen for its superior hardness, abrasion resistance, and lubricity, all delivered in a thinner application. Its advanced resin technology allows the integration of high-performance engineered ceramics, making it ideal for high-wear internal components.
Before spraying, the exterior of the receiver was carefully masked using high-temperature tape to prevent overspray. Once applied, the Elite Blackout was fully cured at 300°F for two hours.
Bolt Coating – Cerakote Dry Film Lubricant (DFL-200)
As part of this build, I also coated the shotgun’s bolt using Cerakote’s new Dry Film Lubricant (DFL-200), a PFAS-free, ceramic-based coating engineered for extreme durability and low-friction performance in high-wear environments. This was the first bolt I have ever coated, so proper preparation and process control were especially important.
The bolt was fully disassembled before any work began. I chose to break it down completely to prevent sandblast media from becoming trapped inside the assembly. Once disassembled, the bolt housing and piston were sandblasted, off-gassed to remove any embedded oils, and then lightly sandblasted again to ensure a perfectly clean surface for coating adhesion.
The DFL-200 was applied in four extremely light coats, essentially dusting the material on and gradually building thickness to the recommended range of 0.25–0.75 mils. This coating is designed to be very thin while still providing excellent lubricity and wear resistance. After application, the parts were baked for 15 minutes once they reached 250°F.
When removed from the oven, the bolt had a slightly greasy film on the surface—unusual in appearance but completely normal for this coating. The parts were then hung for 24 hours to complete the curing process. Once fully cured, I carefully reassembled the bolt and installed it back into the shotgun, completing this portion of the project.
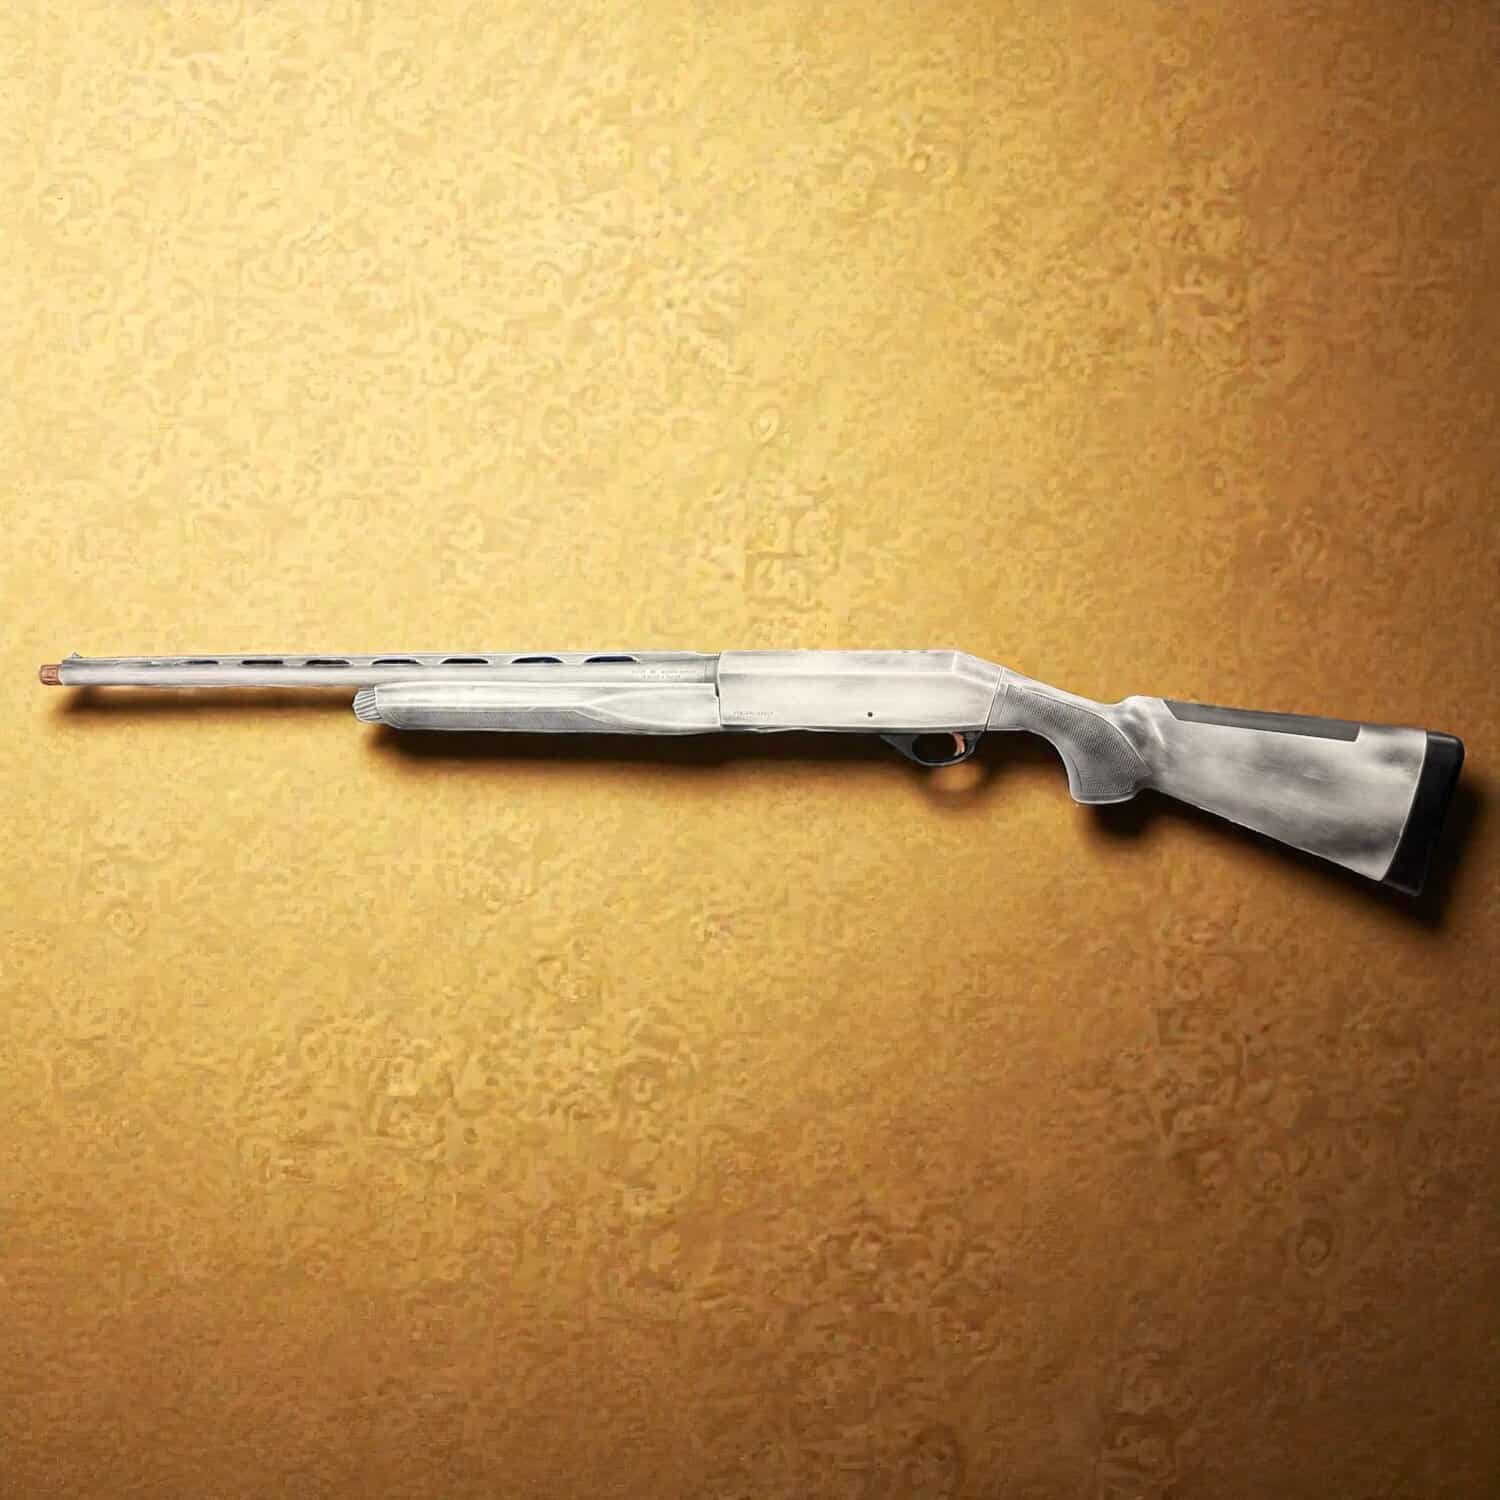
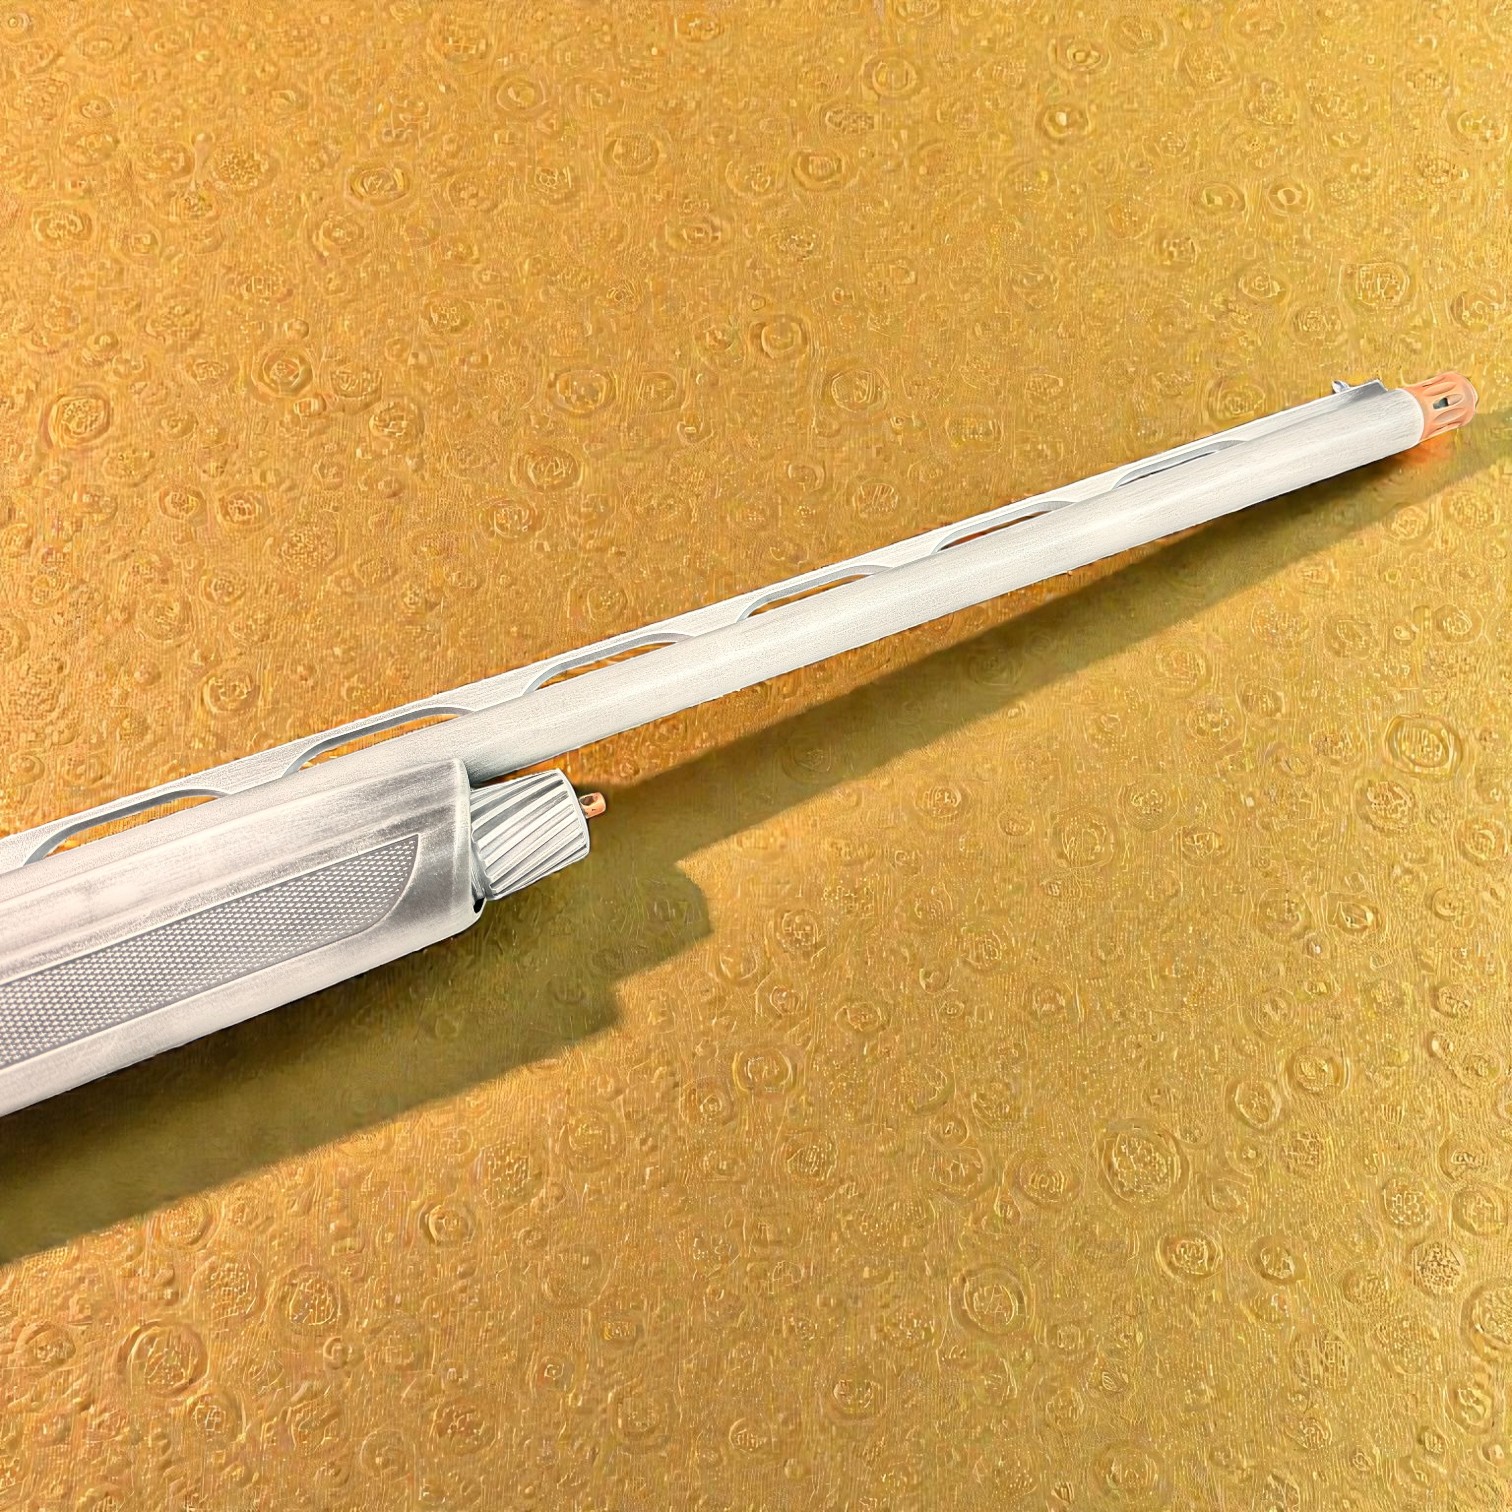
Frost White Base – Exterior Components
After curing the interior, the receiver was remasked—this time protecting the inside so the Frost White H-Series could be applied to the exterior. The Frost White base was sprayed on the receiver, stock, and handguard to establish the clean foundation of the build. These parts were then cured in the oven at 170°F for two hours according to H-Series specifications.
I always fully cure the base coat before performing any distressing work. This ensures the base layer remains intact when removing the topcoat later during the battleworn process.
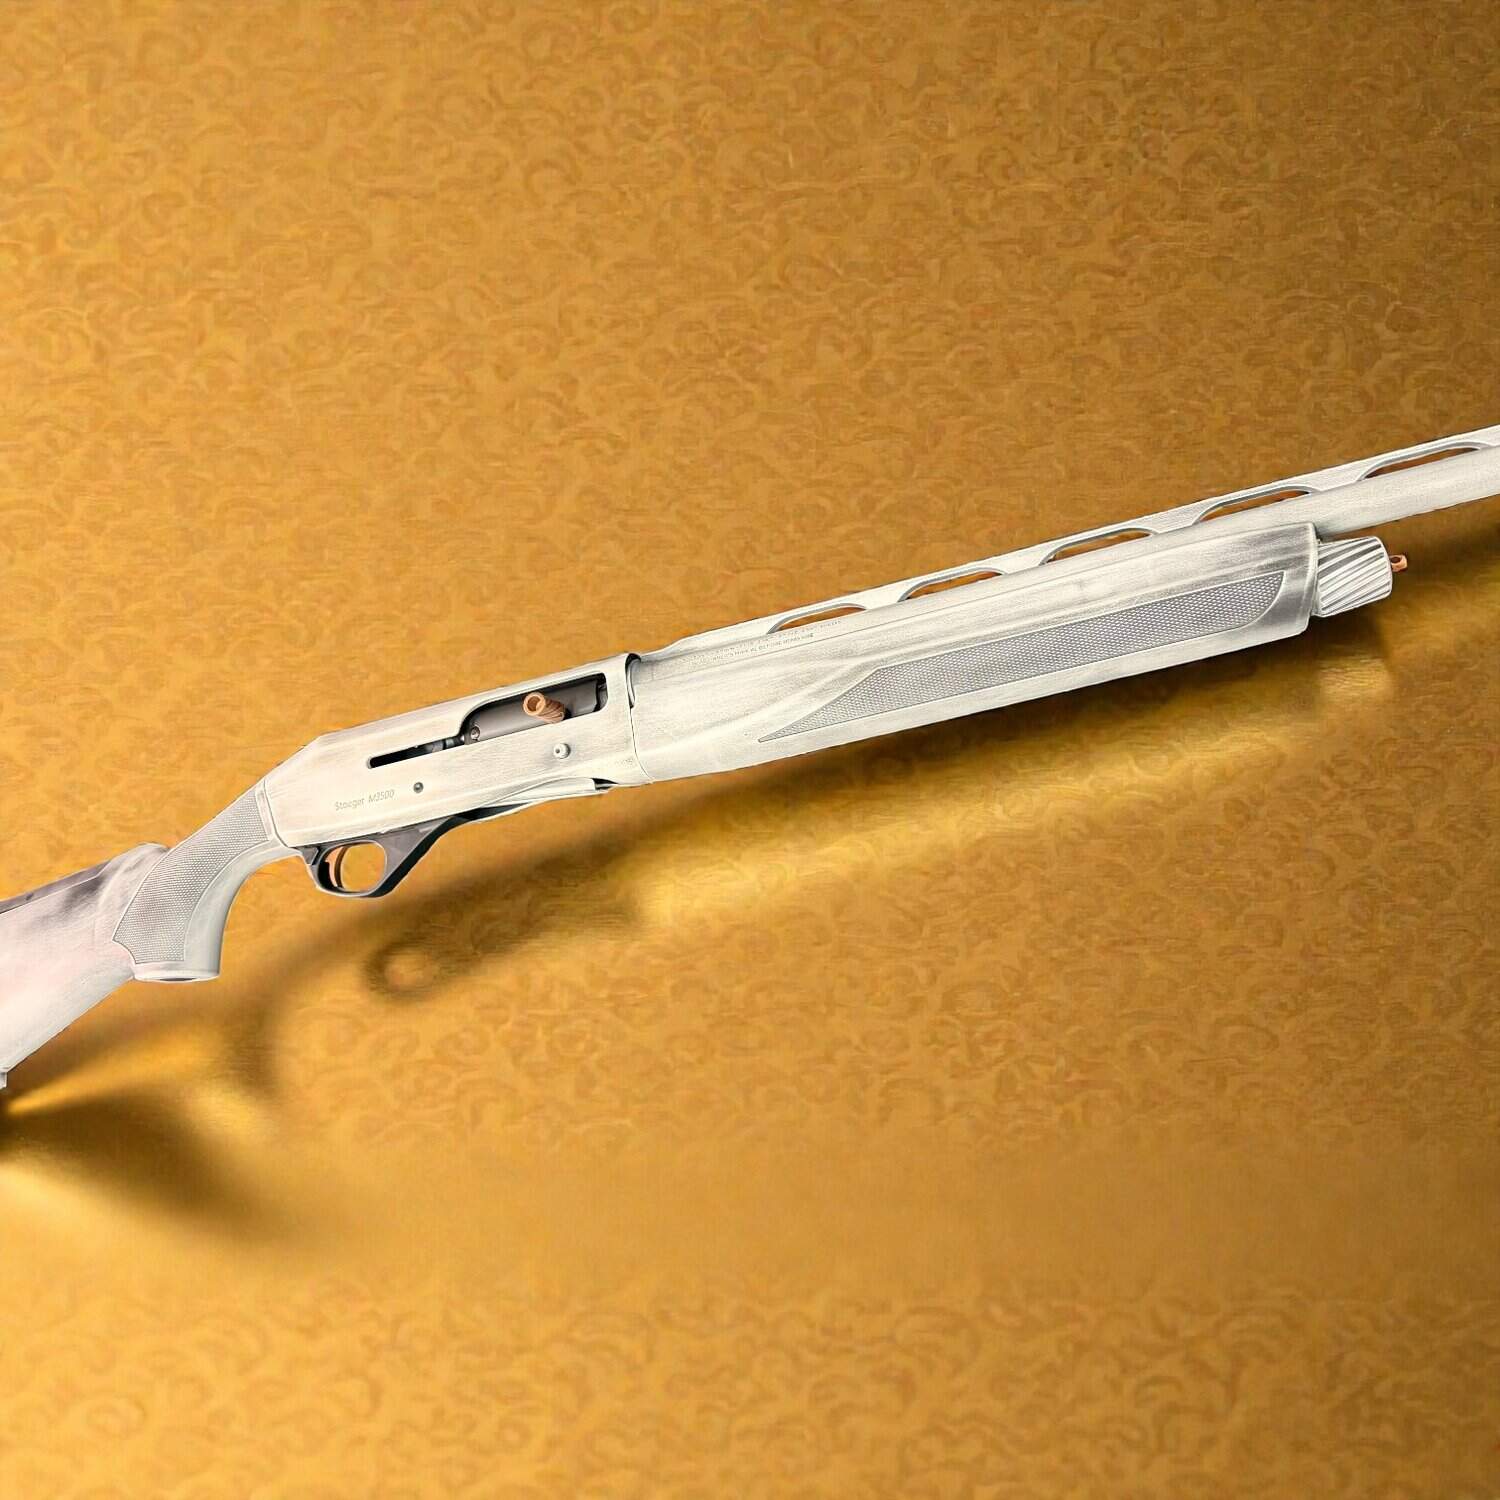
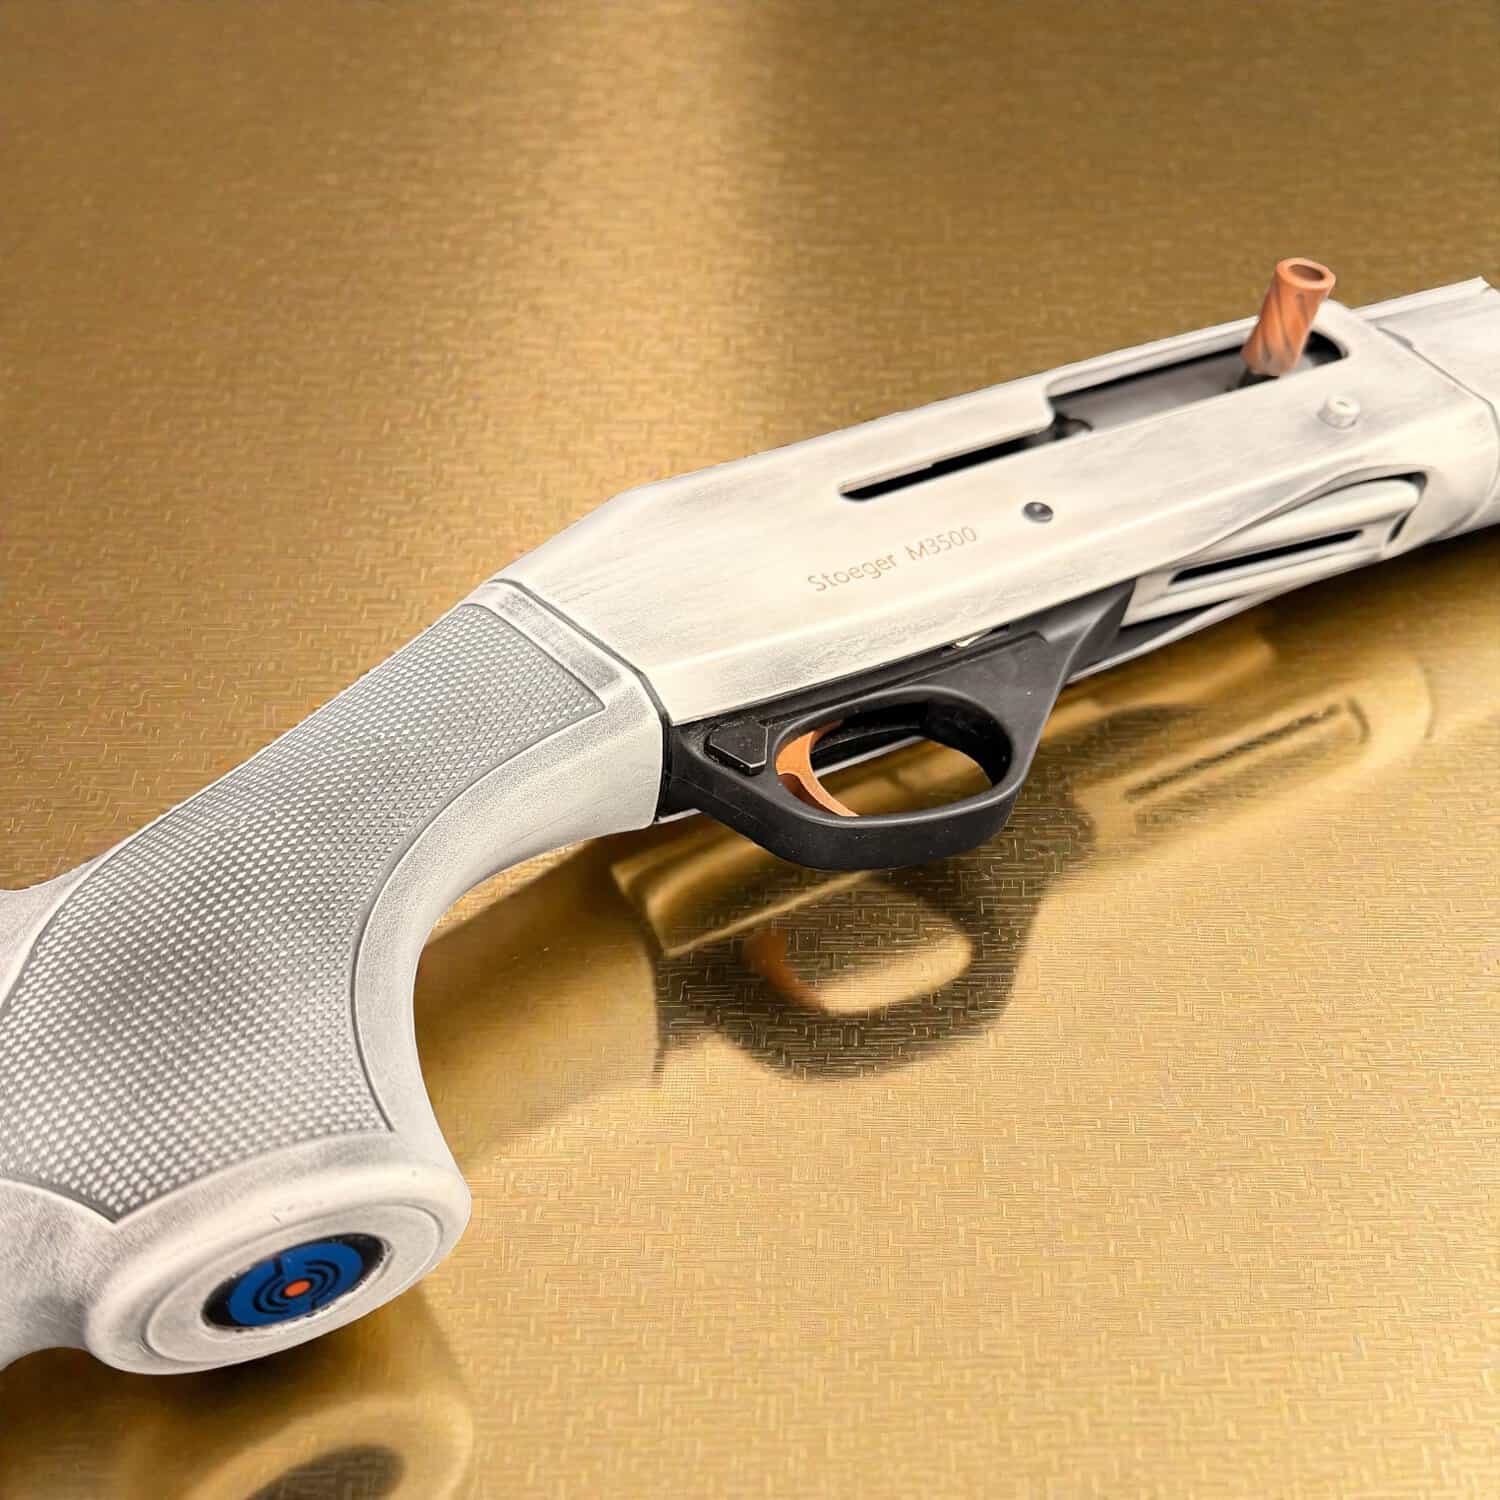
Copper Accent Work
The customer requested copper Cerakote on several key details: the trigger, choke tube, charging handle, and the “Stoeger M3500” lettering on the receiver. The metallic nature of copper created a unique challenge when filling the engraved lettering. Normally, I use a precision pen tool, but metallic coatings do not flow well through it.
To solve this, I used my Iwata HVLP spray gun to lightly mist copper over the lettering, allowing the paint to settle into the engraving. I then carefully wiped the surface using a rag and acetone, removing excess coating while leaving copper only in the recessed lettering. This technique produced clean, sharp results despite the limitations of metallic Cerakote.
To tie the theme together, I also applied a subtle distressed effect to the copper components so they matched the overall battleworn aesthetic of the firearm.
Creating the Distressed Battleworn Finish
With the Frost White base fully cured, the distressed effect was created using Graphite Black H-Series as the topcoat. A light coat was sprayed over the Frost base, then baked for approximately 10 minutes—just long enough for the coating to set and become tack-free.
Once ready, I used ultra-fine (0000) steel wool to selectively remove portions of the Graphite Black, revealing the Frost White beneath. This technique creates natural wear patterns and texture, giving the shotgun the rugged, battleworn appearance the customer requested. Because the Frost base was fully cured beforehand, the steel wool removed only the top layer without damaging the foundation.
Final Curing and Reassembly
After all coating work and distressing were complete, every part received its final cure cycle to ensure maximum durability and proper bonding. Once cooled and inspected, the shotgun was handed back to my gunsmith for professional reassembly and function checks.
Final Result